On this page18 sections
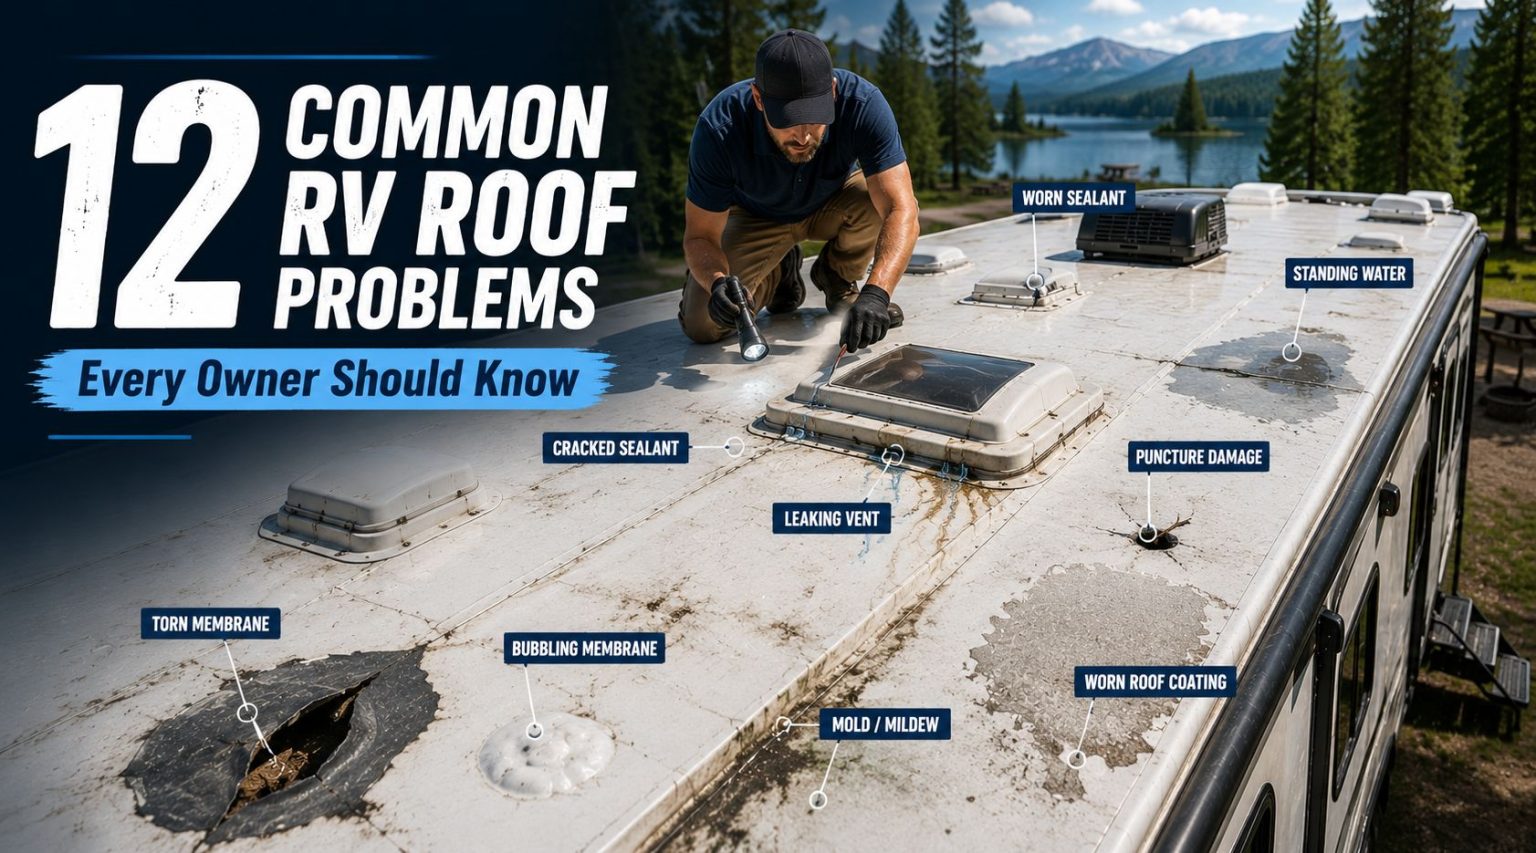
An RV roof takes on more damage than almost any other part of the rig, and it does it quietly. There’s no engine light for a cracked seal or a slowly failing seam, so most common RV roof problems build for months before they show up as a stain on the ceiling or a soft spot underfoot. Knowing what to watch for is the difference between a cheap fix and a repair bill that runs into the thousands.
Here’s how we put this list together: we looked at what RV technicians, service centers, and roofing specialists flag most often, cross-referenced it with what RV owners actually report dealing with, and organized it into the 12 problems worth knowing before they catch you off guard.
1. Cracked or Deteriorated Sealant
This is by far the most common starting point for almost every other problem on this list. Sealant around vents, skylights, seams, and edges naturally breaks down from UV exposure and temperature swings. Once it cracks or pulls away from the surface, it opens the door for water to get underneath the roof membrane.
Watch for: visible cracking, shrinking, or gaps in sealant lines, especially around any roof penetration.
2. Leaks Around Vents and Skylights
Every hole cut into the roof for a vent, fan, or skylight is a potential weak point. The seal around these fixtures wears out faster than the flat sections of roof, since they flex more with heat and movement.
Watch for: water stains directly under a vent or skylight, or a musty smell near these fixtures.
3. Punctures From Tree Branches and Debris
Low branches, falling limbs, and even debris kicked up from the road can puncture or tear rubber and fiberglass roofing. Unlike a slow sealant failure, this kind of damage lets water in immediately.
Watch for: visible tears, holes, or scrape marks after parking under trees or driving through low clearance areas.
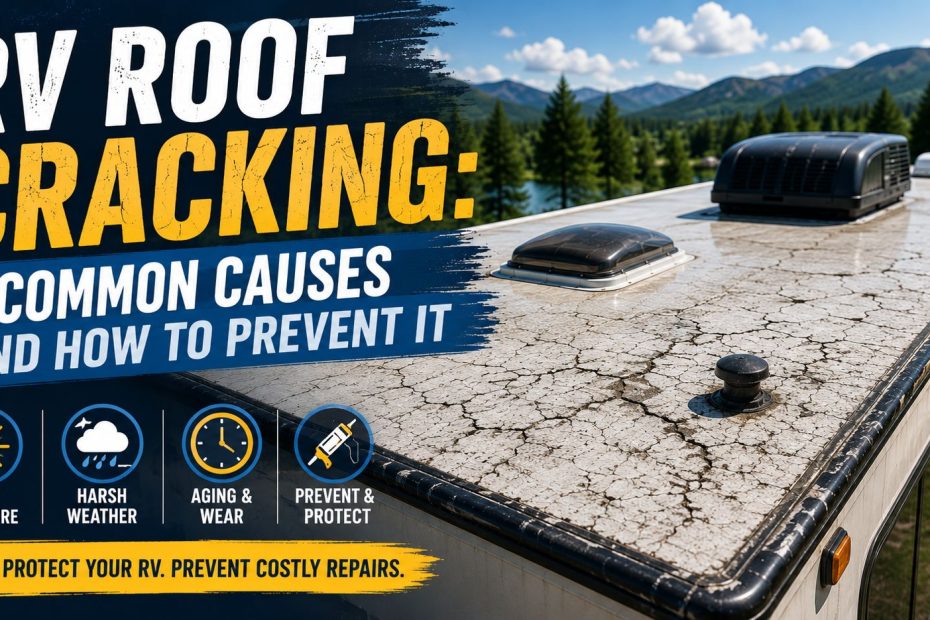
4. UV Damage and Sun Degradation
Constant sun exposure breaks down roofing material over time, especially rubber membranes like EPDM. This shows up as chalking, a powdery white residue, or a roof surface that’s gone brittle and less flexible than it used to be.
Watch for: chalking, fading, or a surface that feels stiff or cracks slightly when pressed.
5. Sagging or Soft Spots
This is one of the more serious problems on the list. A soft, spongy, or bowing section of roof usually means water has already reached the decking underneath and started to cause rot. It’s rarely a surface level issue by the time it’s noticeable underfoot.
Watch for: any area that feels different from the surrounding roof when walked on, particularly near past leak points.
6. Poor Drainage and Pooling Water
RV roofs are flatter than a house roof, so they depend on proper slope and clear drainage paths to shed water. Clogged gutters, debris buildup, or a roof that’s settled unevenly can cause water to pool instead of running off, which puts extra pressure on nearby seals.
Watch for: standing water after rain that doesn’t drain within a reasonable time.
Which roof problem can't wait?
Match what you're seeing to one of the 12 common problems and how quickly to deal with it.
Tick everything you are seeing. Your action plan sorts itself by urgency.
Touch it up with fresh sealant; it's a cheap DIY spot repair. If sealant is failing across multiple areas, bring in a professional.
The seal around the fixture has likely failed. Reseal it, and check the surrounding roof for soft spots.
Punctures let water in immediately. Patch it right away; a patch kit is typically inexpensive if you do it yourself.
Sun is breaking the material down, especially on EPDM. Keep it clean and inspect regularly so cracks get caught early.
Water has likely reached the decking and started rot. Call a professional; decking repair is rarely a DIY job.
Clear clogged gutters and debris from the drainage paths. Pooling water puts extra pressure on nearby seals.
Likely a worn AC gasket or seal, which can leak even on an otherwise sound roof. Get the gasket and surrounding sealant addressed.
Trapped moisture is feeding mold, possibly inside the roof structure. Track down the source, and call a pro if mold is inside the RV.
The adhesive is weakening or the material is delaminating. Get it resealed before water works its way under the membrane.
Likely roof ballooning from a membrane edge that wasn't fully adhered. Call a professional, and contact the dealer if the RV is new.
Every mount is a water entry point. Secure and reseal it, and make sure any new installation was resealed properly.
Could be a manufacturing defect. Document it and contact the manufacturer or dealer; an inspection soon after purchase helps catch these.
Your action plan
Act now0
Fix soon0
Keep watching0
7. AC Unit Seal Failures
The gasket and sealant around a roof mounted AC unit is another common failure point, since it’s a large fixture with its own seams and screws holding it to the roof. A worn AC gasket can leak even if the rest of the roof is in decent shape.
Watch for: water stains near the AC unit, or visible gaps between the unit and the roof surface.
8. Mold and Mildew
Trapped moisture, whether from a slow leak or debris holding water against the roof, creates the right conditions for mold and mildew to grow. This can develop on the roof surface itself or, more concerning, inside the roof structure where it’s harder to spot.
Watch for: dark streaks, discoloration, or a musty smell, even without an obvious visible leak.
9. Seam Separation and Delamination
Seams where sections of roofing material meet are naturally more vulnerable than the middle of a flat panel. Over time, adhesive can weaken and cause seams to separate, or the roofing material can delaminate from the layer underneath it.
Watch for: visible gaps or lifting along seam lines, especially near the front and rear edges of the roof.
10. Roof Ballooning or Bubbling
This is a less common but increasingly reported issue, particularly on newer travel trailers and fifth wheels. It happens when the front edge of the roofing membrane isn’t fully adhered during manufacturing, allowing wind to get underneath while driving and cause the roof to bubble or balloon outward.
Watch for: a visibly raised or bubbled section near the front of the roof, especially after highway driving.
11. Damaged Antenna, Solar Panel, or Vent Mounts
Any hardware mounted to the roof, antennas, solar panels, satellite domes, comes with its own set of screws and sealant points. Each one is an additional place water can get in if it isn’t sealed and maintained properly.
Watch for: loose hardware, cracked sealant around mounting brackets, or new installations that weren’t resealed properly.
12. Manufacturing Defects
Less common, but worth knowing about: some RVs have left the factory with roofing material that didn’t cure properly or wasn’t installed to spec. This isn’t something routine maintenance can prevent, but it’s part of why an inspection soon after purchasing an RV, new or used, is worth doing.
Watch for: roof problems that appear unusually early in the RV’s life, or issues that seem inconsistent with normal wear.
RV roof leak map
Tap a hotspot to see what fails there, how to check it and how it gets fixed. Mark each spot as you inspect it.
Front cap seam
Common leak point- What fails
- The joint where the front cap meets the roof takes the most wind load and chassis flex, so its lap sealant cracks and lifts first.
- How to check
- Run a finger along the whole bead. Look for hairline cracks, shrink-back from the edge, gaps or lifted corners.
- Typical fix
- Clean off loose sealant, then run a fresh bead of lap sealant made for your roof material. Use non-sag where the seam turns vertical.
Rear cap seam
Common leak point- What fails
- Same failure as the front: movement and sun break down the sealant where the rear cap meets the membrane.
- How to check
- Inspect the full width, including the corners where the seam turns down the sidewalls.
- Typical fix
- Remove what is loose and reseal. Self-leveling sealant on the flat roof, non-sag on vertical faces.
Roof vent flange
Common leak point- What fails
- Vent flanges are screwed through the roof. Sealant over the flange and screw heads cracks, and plastic vent lids go brittle in the sun.
- How to check
- Look for cracked sealant over every screw head, gaps at the flange corners and crazing or cracks in the lid.
- Typical fix
- Reseal over the flange and all screw heads. Replace a cracked lid or frame rather than patching it.
Air conditioner
Common leak point- What fails
- The AC sits on a foam gasket that compresses and takes a set over time, letting water past the roof opening.
- How to check
- Look for water stains on the ceiling around the AC, a gap under the shroud or loose mounting bolts inside.
- Typical fix
- Replace the gasket and snug the bolts to the maker's spec. Do not seal the AC base with caulk; it relies on the gasket.
Skylight
Common leak point- What fails
- Skylight domes craze and crack with UV, and the sealant around the frame fails like any other penetration.
- How to check
- Look for crazing, cracks or cloudiness in the dome and cracked sealant around the frame.
- Typical fix
- Reseal the frame. A cracked dome needs replacing; tape over a crack is only a temporary stop.
Second vent or fan
Common leak point- What fails
- Powered fans and bath vents fail the same way as any vent, and the extra hardware adds screw penetrations.
- How to check
- Check sealant over every screw, around the flange and at the corners.
- Typical fix
- Reseal over the flange and fasteners, and replace a cracked lid.
Refrigerator roof vent
Common leak point- What fails
- The fridge vent cap is a large opening with a long sealant perimeter that is easy to forget.
- How to check
- Inspect the sealant around the whole base and look for cracks in the cap.
- Typical fix
- Reseal the base; replace the cap if it is cracked.
Antenna, satellite and solar mounts
Check each season- What fails
- Every mount foot is a screw penetration, and cable entry plates add more.
- How to check
- Look for cracked sealant over each foot and at the cable entry plate.
- Typical fix
- Dab fresh sealant over each fastener and around cable entries.
Sidewall edge terminations
Common leak point- What fails
- Where the roof membrane wraps over the sidewall, a termination bar is screwed down and covered with sealant that cracks along its length.
- How to check
- Walk both edges and look for cracked sealant over the termination bar and exposed screw heads.
- Typical fix
- Reseal the full run. Straight seams like this are also where repair tape works well.
Open roof membrane
Most urgent when it fails- What fails
- The open field of the roof shows chalking, bubbles, tears and punctures, and soft spots where water has reached the decking.
- How to check
- Walk carefully and feel for flex or sponginess. Look for tears, bubbles and chalky residue.
- Typical fix
- Patch tears and punctures with a repair tape made for your membrane. Soft spots mean decking damage: repair them before they spread.
Ladder brackets
Check each season- What fails
- Upper ladder brackets are bolted through the rear cap or roof edge and loosen with use.
- How to check
- Look for cracked sealant or a loose bracket at the top of the ladder.
- Typical fix
- Tighten the bracket and reseal over the fasteners.
Plumbing vent pipes
Check each season- What fails
- Small plumbing stack vents have their own sealant collar and cap, which crack and blow off.
- How to check
- Make sure each cap is present and the sealant around the pipe is intact.
- Typical fix
- Replace a missing cap and reseal around the base.
Comparison: Symptom to Likely Problem
| Symptom | Likely Problem |
|---|---|
| Ceiling stain under a vent | Cracked sealant or vent seal failure |
| Soft or spongy roof section | Water damage to the decking |
| Bubbled section near the front of the roof | Roof ballooning from a manufacturing gap |
| Musty smell with no visible stain | Hidden mold or trapped moisture |
| Standing water after rain | Poor drainage or a low spot |
| Water near the AC unit | AC gasket or seal failure |
What These Problems Typically Cost to Fix
Costs vary by region, roof material, and how far a problem has progressed, but here’s a general sense of the range:
- Sealant touch-ups: Often under $20 in materials for a DIY spot repair, since a single tube of quality sealant covers a good amount of ground.
- Vent or skylight reseal: Usually a low cost DIY job, similar to general sealant work, unless the fixture itself needs replacing.
- Small punctures or tears: A patch kit is typically inexpensive, though labor costs rise if you hire it out rather than doing it yourself.
- Soft spots and decking repair: This is where costs climb significantly, since it usually involves cutting into the roof, replacing damaged decking, and reinstalling the membrane. This is rarely a DIY-friendly repair.
- Roof ballooning repair: Costs depend on whether it’s a localized fix to the front strip or a more involved reattachment of the membrane, and can range from a moderate repair to a much larger job if the manufacturer defect is widespread.
- Full roof replacement: The most expensive outcome on this list, typically reserved for roofs with extensive water damage, structural rot, or age related failure across the whole surface.
The pattern is consistent: the earlier a problem is caught, the cheaper it is to fix. A $15 tube of sealant applied in time can prevent a repair that costs hundreds or even thousands of dollars later.
Why These Problems Are Worth Catching Early
Almost every item on this list starts small. A hairline crack in sealant costs a few dollars and a few minutes to fix. Left alone, that same crack can lead to water in the decking, mold growth, and eventually a repair that requires replacing sections of the roof structure itself. The pattern across nearly all of these common RV roof problems is the same: small, cheap fixes early, or large, expensive fixes later.
A consistent inspection routine is the single best defense. Walking the roof every few months, and especially after storms or long trips, gives you the chance to catch cracked sealant, early soft spots, or loose hardware before they turn into something bigger. Our RV roof maintenance checklist breaks down exactly what to check and how often throughout the year. If you’re dealing with an active leak right now, our guide on what to do when your RV roof leaks after heavy rain walks through finding the source and stopping it. And if regular cleaning isn’t part of your routine yet, keeping the roof clean makes small cracks far easier to spot, covered in our guide to the best RV roof cleaner options and how to clean an RV rubber roof without damaging it.
When to Call a Professional
Most sealant touch-ups and basic cleaning are manageable DIY tasks. Bring in a professional if you notice:
- Any soft or spongy section of roof, since this usually means the decking needs repair, not just a surface fix
- Roof ballooning or bubbling, which often involves the underlying membrane attachment, not just sealant
- Widespread sealant failure across multiple areas rather than one isolated spot
- Signs of mold inside the RV structure, not just on the surface
Frequently asked questions
What is the most common RV roof problem?
Cracked or deteriorated sealant is by far the most common starting point, since it’s the root cause behind most leaks, water damage, and mold issues on this list.
How do I know if my RV roof has water damage?
Soft or spongy spots underfoot, ceiling stains, a musty smell, and visible sagging are the clearest signs. If you notice any of these, it’s worth having the area inspected before it spreads further.
Can I fix RV roof problems myself?
Many of them, yes. Cleaning, sealant touch-ups, and basic inspections are manageable DIY tasks. Soft spots, roof ballooning, and widespread damage usually call for a professional.
How often should I check for these problems?
A full inspection every six months, plus a quick check after storms or long trips, is enough to catch most of these issues early.
Is roof ballooning covered under warranty?
It depends on your specific warranty and how the manufacturer classifies the defect. If you notice bubbling shortly after purchasing a new RV, it’s worth contacting the manufacturer or dealer directly rather than assuming it’s not covered.
Do all RV roof types have the same problems?
Not exactly. Rubber roofs are more prone to UV damage and chalking, fiberglass can develop stress cracks, and aluminum holds up well against UV but still has seam and screw point vulnerabilities. The underlying causes, like sealant failure and trapped moisture, apply across all roof types.
Final Thoughts
Common RV roof problems rarely appear out of nowhere. Most of them start as something small and easy to fix, and the owners who avoid the expensive repairs are usually the ones who caught the issue early rather than the ones who got lucky. Make roof inspection a regular habit, not a one time task, and you’ll catch most of these problems long before they become a serious repair.
Check your roof before your next trip. A few minutes now can save you from discovering one of these problems the hard way, mid storm, on the road.
Did this guide help with your rig?

Written by