Many areas in the US are prone to hail storms all throughout the year. In Missouri we are prone to some of the most severe hail storms across the nation. That means your beloved RV could be struck by an infamous hail storm at any time while driving along the highway until it is safely in the backyard. If you don’t plan to leave your vehicle in your garage throughout the year, Missouri RV owners are likely to be hit by hail at any time.
Tips To Avoid Hail Damage
Although we recognize that the nature of RV-ing frequently isn’t a good fit for this kind of preventive measure however, we’ve provided three useful suggestions to follow when you are in the middle of a hailstorm or when one is nearing your town or city.
1. Check the Weather Forecast
It’s a simple, but essential idea! One of the most simple actions you can take is to look up the weather forecast for hail storms that are in your current location or the area you are travelling to. If you are concerned about the possibility of hail, perhaps you should delay your travel plans. If you’re close to or in your home, make sure you put your RV in your garage or under your carport.
2. If you’re driving, locate a covered Area immediately
If you’re trapped in a hail storm on the road or in the RV parks, you should try to locate shelter as fast as you can. We recommend that you stop at an open parking garage, gasoline station, beneath a tree that is fully grown. In the event that none are accessible then park your RV close to a structure as you can. This will give you some shade.
3. Make sure you have an RV cover in the event that you are unable to access Shelter
If you reside in an area that is prone to hail, it may be worthwhile to invest in a protective cover to protect your vehicle. Although this won’t stop every hail-related dent or ding from happening, the cover can help minimize the amount of damage. In addition, they can be excellent in protecting your RV from weather conditions like intense rain, harsh sunlight and powerful wind.
What Should You Do When Your RV is struck by hail
The extent and size of the actual hail particles and the extent of damage they cause to your vehicle could vary from small cracks and scratches to massive golf ball-sized scratches. On the outside hail damage to cars may appear like the damage on an RV. The majority of cars can be repaired by a procedure called paintless dent repairs, but hail dent removal is different for RVs. This is due to the fact that RVs comprise a majority from aluminum, fiberglass as well as wood sheathing. This means that the repair of damage caused by hail to your RV is more expensive and time-consuming than fixing a typical vehicle.
In addition to damaging the windows and windshields of your RV and body hailstones, body hailstones may cause damage to the following:
How do I know when I’m in need of Hail Damage Repair?
Other than obvious dents on your RV’s bodywork , or cracked windows, here are couple of other indicators that your RV is in need of repairs following a hail weather event:
Damage is caused to vent and AC unit lids. The impact of hail can damage your air conditioners, or vent lids. If not repaired properly it could result in an increase in moisture in your motorhome, which could result in further damage later on.
There are tiny bubbles or spots in the membrane made of rubber. The small amount of bubbles and tiny pots following a hailstorm could be a sign that the membrane is not firmly attached to the underlayment in specific regions. If it is not repaired sooner rather than later this can expose your RV to further damage.
There may be mild to large spider cracks, or bruises to the gel coat Your RV’s fiberglass may also be affected by spider web cracks and bruises that allow moisture to enter the RV. If water is allowed to penetrate the surface, it could result in roofs sagging and delamination.
A few of these fixes like a vent repair could seem straightforward enough to repair by yourself, but they can turn out to be quite complex. For instance air vents are electrical components. If they’re not sealed correctly it could result in water damage afterward. This is why it’s recommended to leave hail damage to experts.
What is the cost of hail damage to my vehicle?
As we have mentioned in one of our earlier blog posts, the cost to repair sheets of sheet steel on RVs is about $9.50 or $13.50 for each square foot. Due to this cost it’s commonplace for RV owners to leave small hail damage, particularly if the damage is cosmetic. While some RV damages may appear minor, it’s best to repair it right as soon as possible.
Minor cosmetic flaws do not just reduce your RV’s selling value, but they could result in more expensive damages in the future. Did you know that the majority of RVs sold after minor hail damage are offered for between 25 and 40 percent of the initial price in Missouri? In addition should you suffer more damages from hailstorms to come, your insurance provider may not be able to cover the repair, because they may refuse to cover your claim due to previous damage.
Repair Your RV Hail Damage Today
If you’ve experienced hail damage to your RV, please be sure to give Elite Dent Company of Springfield MO a call. Elite Dent are the go to professional paintless dent removal company in the midwest that will have your vehicle looking as new, and get you back in the road in very little time in any way.
Are you experiencing hail damage to your vehicle? Visit this link to make an appointment to repair it. As the industry’s top choice Coach Specialists is here to assist you with your repair requirements for your RV. Contact us today or complete our contact form below.
You’ve had your RV for many years now. It keeps you warm, dry, and safe year after year on each trip you take. You’re now giving your roof the bad eye, knowing that it is time to give up several months’ pay to give it some TLC, or perhaps it is time to reseal the RV roof.
So, what is the cost of resealing your RV roof?
It depends on what type of roof you have, and how much damage your roof has sustained. Here are the average costs per square foot:
Rubber roof
45 cents per square foot
Fiberglass roof
18 cents per square foot
Metal Roof
21 Cents per Square Foot
You should consider the cost of roof coatings as well as the costs of roof cleaning chemicals and supplies that will be required to prepare the roof for the new coating.
What is the Difference between Sealants and Coatings?
Your RV roof will eventually need to be replaced, just like a house. It may be worth considering re-coating your entire roof if your RV is more than 9 years old. Coatings can be used to cover the entire roof. You will need to choose the right coating for your RV’s roof, depending on whether it is made of rubber, fiberglass or metal.
Before applying any sealants or coatings, thoroughly clean the roof. You can find many roof coatings online. Heng’s Rubber Roof Coating was the best. Two coats of rubber roof coating are recommended. The first coat should be completely dry before applying the second.
Only one coat is required if you are using a silicone roof coating. Acrylic and urethane types require two coats plus a primer.
You can use an RV roof sealant to “coat” your roof. Many are used to seal cracks and areas on the roof that have leaks. Sealants can be liquid, tape, caulk, or both. Sealants work by sealing holes in the RV roof, around vents, and gaps between windows, as well as cracks at the a/c unit. To ensure that sealant adheres properly, clean the area where it will be applied.
A caulk gun can be used with the appropriate roof caulk to seal cracks. Sealant tape such as EternaBond is another useful product. It requires very little preparation. It is available in a variety of lengths and widths. It also protects against the elements well.
It is common to use the terms coatings and sealants interchangeably. You can find the right coating or sealant to protect your RV.
Re-roofing or coating your roof
The process of coating an RV roof should take less than one day. Wash the RV roof first with a suitable cleaner. The roof should then dry completely. Rubber roofs can be cleaned with a cleaner/activator. Many are available on Amazon.com. The cleaner/activator can be used to open pores in the EPDM membrane over several hours. This allows the coatings to bond with the roofing.
It’s a good idea for RV owners to tape the edges using a quality painter’s tape to prevent any coating from sticking to the sides.
Use a medium-nap roll to apply the first coat. Let dry completely. Drying time can vary depending on temperature and humidity. Allow the second coat to dry for 3-4 hours before it is time to apply the roof coating. To ensure that the roof coating is fully dry, do not allow the RV to be used for at least 24 hours.
Clean and dry the roof area where the sealant will be applied. There are many options for RV roof cleaners. A mixture of Tide and warm water works well. Dawn dish soap is useful for many cleaning tasks but can leave a film on your roof that could prevent sealant adhering.
Check the RV roof under good lighting. You want to find potential leaks and seal them before any damage can occur.
You will only need to remove old sealant from cracks in the roof if it is separating or loose. Remove a rubber roof carefully to avoid damaging the material. The sealant can be removed with a putty knife, or a flat, wide blade. A heat gun and a putty knife are helpful in removing an aluminum roof.
Use a cloth to clean the area and then use denatured alcohol. Seal the RV roof with the appropriate sealant. If necessary, apply additional sealant.
Regular inspection of seams on your RV’s exterior is a good idea. You can find sealants that are compatible with the RV’s roof and surface in the RV Owner’s Manual.
How to Find a Roof Leak
A roof leak will not happen to everyone. There will be those who experience a roof leakage. It’s best to learn how to prevent them from happening, and/or where they are coming from if your RV does leak. In many areas of our lives, we can all agree with Ben Franklin’s statement that “an ounce of prevention is worth a thousand cures”. Leaks are not a topic that is fun, so it is worth your time to keep an eye on them.
A professional can perform a pressure test inside the RV to find external leaks. This is the best way to identify if there is a roof leak. Air will be forced out of your RV’s crevices and cracks if you create more pressure inside than outside. A professional can inspect the RV’s exterior with soapy water to find any potential leaks.
Leakage can be caused by several items, such as a damaged compression seal, urethane or silicone sealant, or a butyl tap used as a filler. You should inspect these items periodically for missing or lose gaskets, cracks or crevices as well as gaps at windows and loose sealant. You can save a lot of money and headaches by being proactive.
You can prevent roof leaks by having a plan for maintaining, restoring, or resealing your roof as necessary.
Is it time to replace my roof?
Rubber TPO roofs should not show signs of tearing or bubbling. You may consider replacing your roof if you notice multiple areas that are showing signs of wear or if the damage is so severe that it is threatening the entire roof.
You will need to take down the awning and other roof-attached items in order to replace the roof. You will need to remove the entire roof membrane and replace any plywood that is damaged underneath. The roof membrane can then be replaced and all roof items (vents, AC units, antenna, etc.) are put back in place. The RV’s sides and roof edges must be sealed properly.
This is a major undertaking that should be handled by an RV technician.
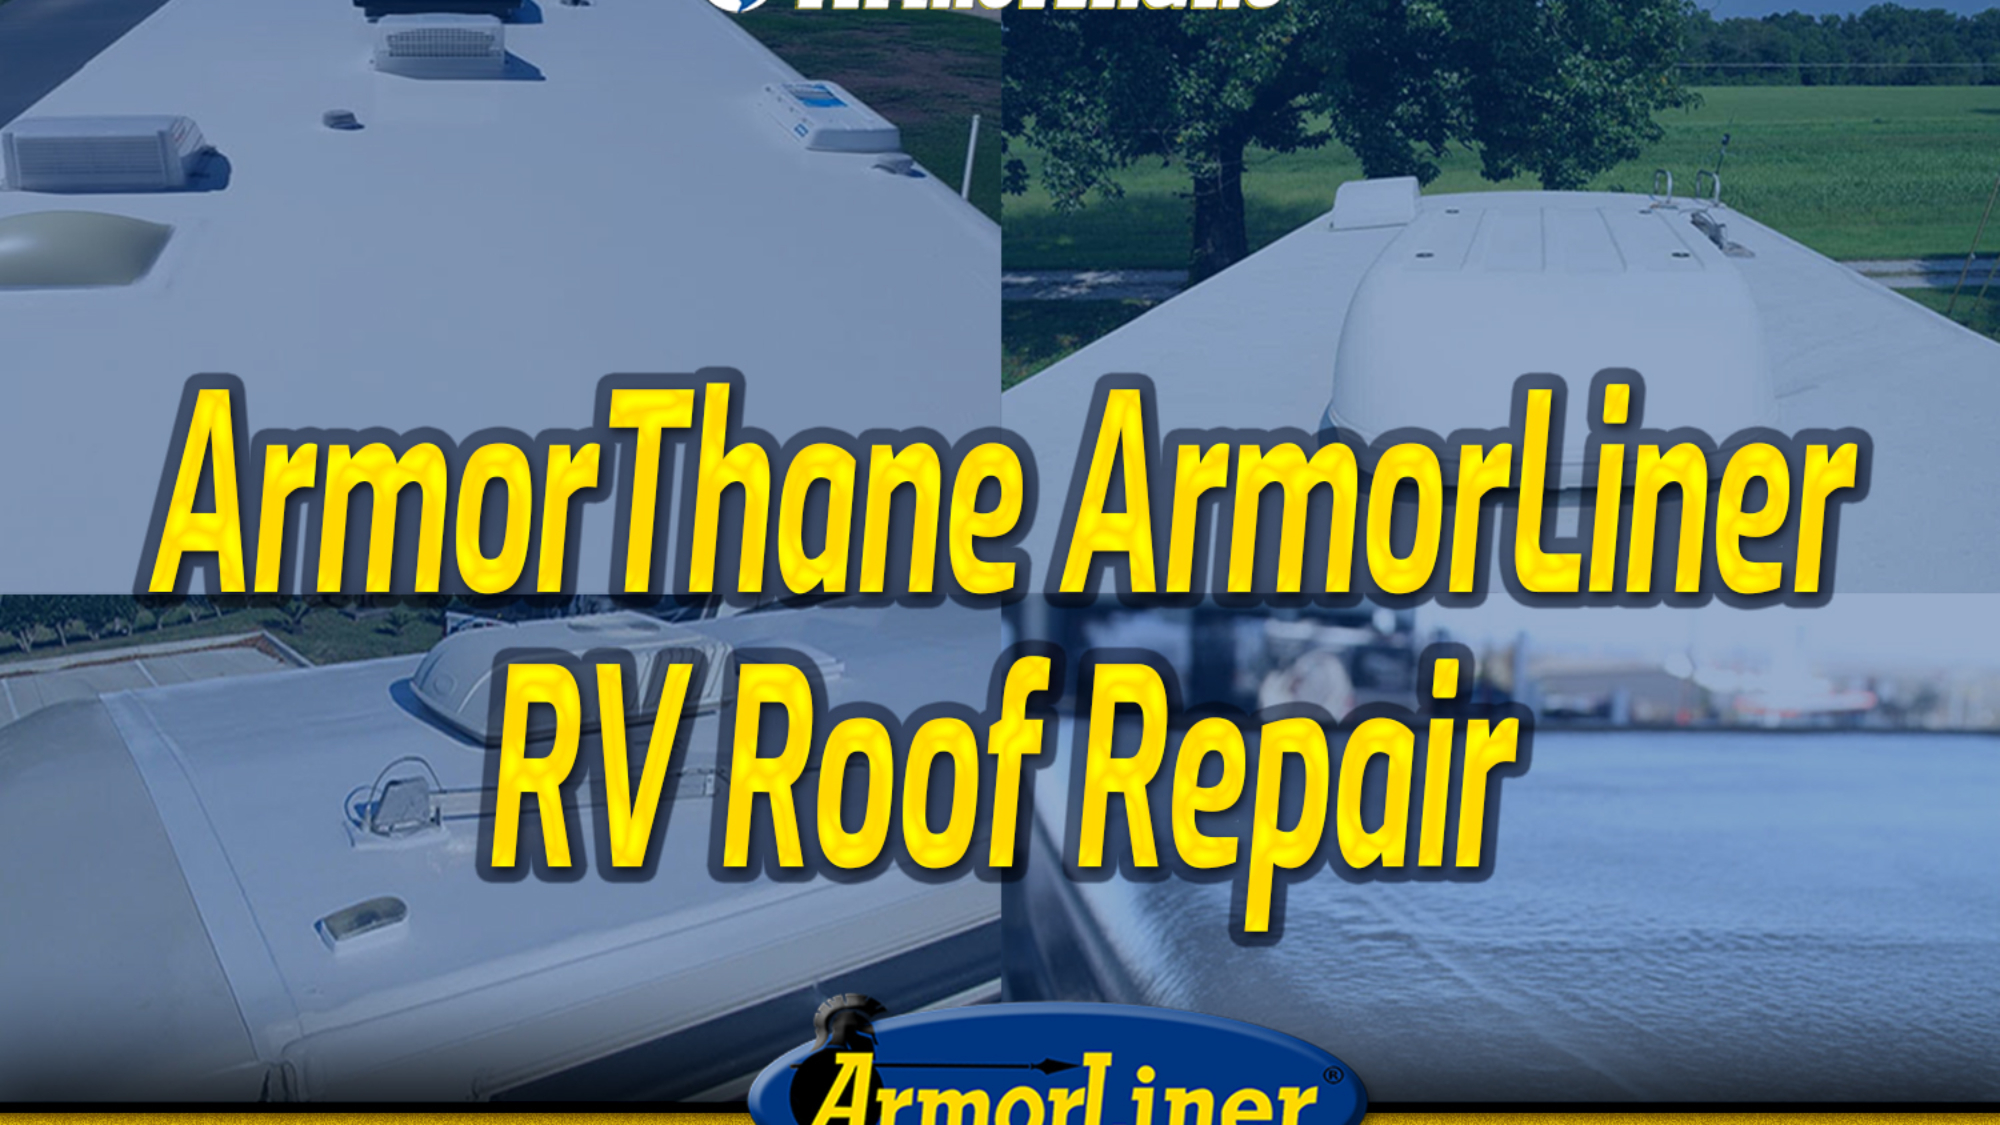
Polyurea Roof Coating
This is a cool product that will keep your RV roof dry and clean for many years.
Spray on rubber bed liners are also installed by the same companies as pick-up trucks. They also use the same product to replace an RV roof. This coating was applied to my pick-up truck and it never got punctured. It lasted for many years despite being thrown concrete, concrete, and even rebar. This is the product that I will use to replace my RV roof.
This type of roof coating is called polyurea roof coating. It is easy to maintain, seamless, puncture-resistant, and will not crack, sun-rot, or deteriorate. Roof coatings do not require inspection, re-sealing or conditioning. It often comes with a 20-year guarantee.
Here is the website for ArmorThane , which is a company that has a multitude of bedliner applicators throughout the world. You might be able to find one near you that does this.
Conclusion
When it comes time to replace your RV roof or reseal it, you can choose which option suits you best. While some people will save money by doing it themselves, others will hire professionals to do the job properly.
Whatever your choice, we hope that this article will help you find the right way!
ArmorThane has changed the RV industry with its spray polyurea technology that creates seamless sprayed RV roofs. Your RV will be watertight without any additional caulking. If you are in the Callahan Florida area, give Final Touch RV a call to find out how ArmorThane can protect your RV. Or if you would like to learn about how you can become a certified ArmorThane applicator yourself, visit or call ArmorThane today!
Best Value
This is the best product available for the best price. ArmorThane’s spray-on roof coating will protect your RV for a lifetime. You don’t need to worry about roof repairs. Get the best quality product for your dollar.
Certified Workmanship
Final Touch RV has been certified by Armorthane to apply state-of-the-art polyurea coatings. Their professionals have received training and can offer a 100% guarantee for all work and product applications.
No Leak Guarantee
ArmorThane is the industry leader in polyurea coatings. Their coatings permanently seal cracks, creating a waterproof coating that will last a lifetime for your RV roof. No need to caulk! Call Final Touch RV Callahan, FL today for a reservation!
Many RV owners search online for solutions to their leaking rubber or fiberglass roofs. Most RV roof materials, such as rubber and sheet plastics need to be renewed every two years for their durability. Leakages in roofs can occur from wear and tear, weather damage, and trees overhanging.
ArmorThane, the industry leader, has the solution you are looking for ongoing roof repairs. The 100% spray-on polyurea protective coating forms a barrier against water seepage and deterioration.
The Process
The RV’s roof must be removed to reveal the plywood roof. Any adhesives are also removed from the wood and sanded. Then, all seams are repaired and any large gaps filled.
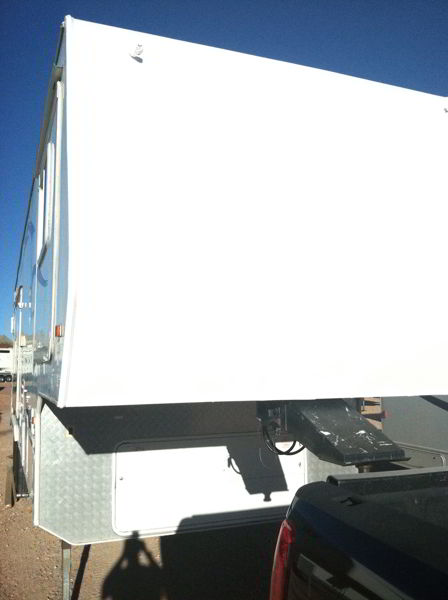
After all surfaces have been properly sanded and prepped, they are then masked and primed with special primers. Finally, ArmorThane is sprayed on the entire area. The new coating of polyurea forms a tight, flexible seal around any protrusions, holes, or bolts. It prevents water loss and UV sun deterioration and gives a beautiful, aluminum-like appearance.
Final Touch RVoffers an array of custom colors for RV owners who want a more unique appearance.
Call Final Touch RV Callahan, Florida to make an appointment for your last roof or call ArmorThane to learn how you can become an authorized applicator.
ArmorThane roofs can be applied indoors using a spray-on method by the certified technicians at Final Touch RV, Callahan, Florida.
Permanently Eliminate Leaks
Final Touch RV professionals apply ArmorThane, a polyurea coating, to your RV roof. You can travel with confidence knowing that there will be no leaks.
Strong, flexible and durable
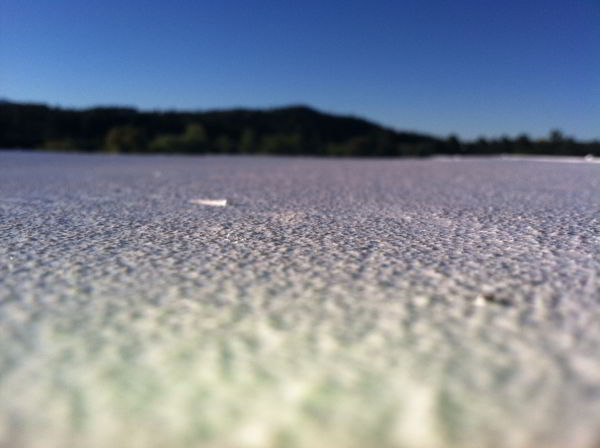
The thickness of the ArmorThane coating is 1/4″ This durable, waterproof, and full-coverage spray-on roofing material will be your last roof. You are guaranteed!
Quick Turnaround
ArmorThane polyurea cure time is approximately 15 seconds. It fully cures in a matter of hours and not days thanks to its fast processing. In no time, you’ll be back on the road!
Are you ready to stop repairing your RV roof forever?
Water and Rot can cause unsalvagable damage. At times an RV roof replacement is the only fix. An RV owner gets creative and uses ArmorThane to do just that!
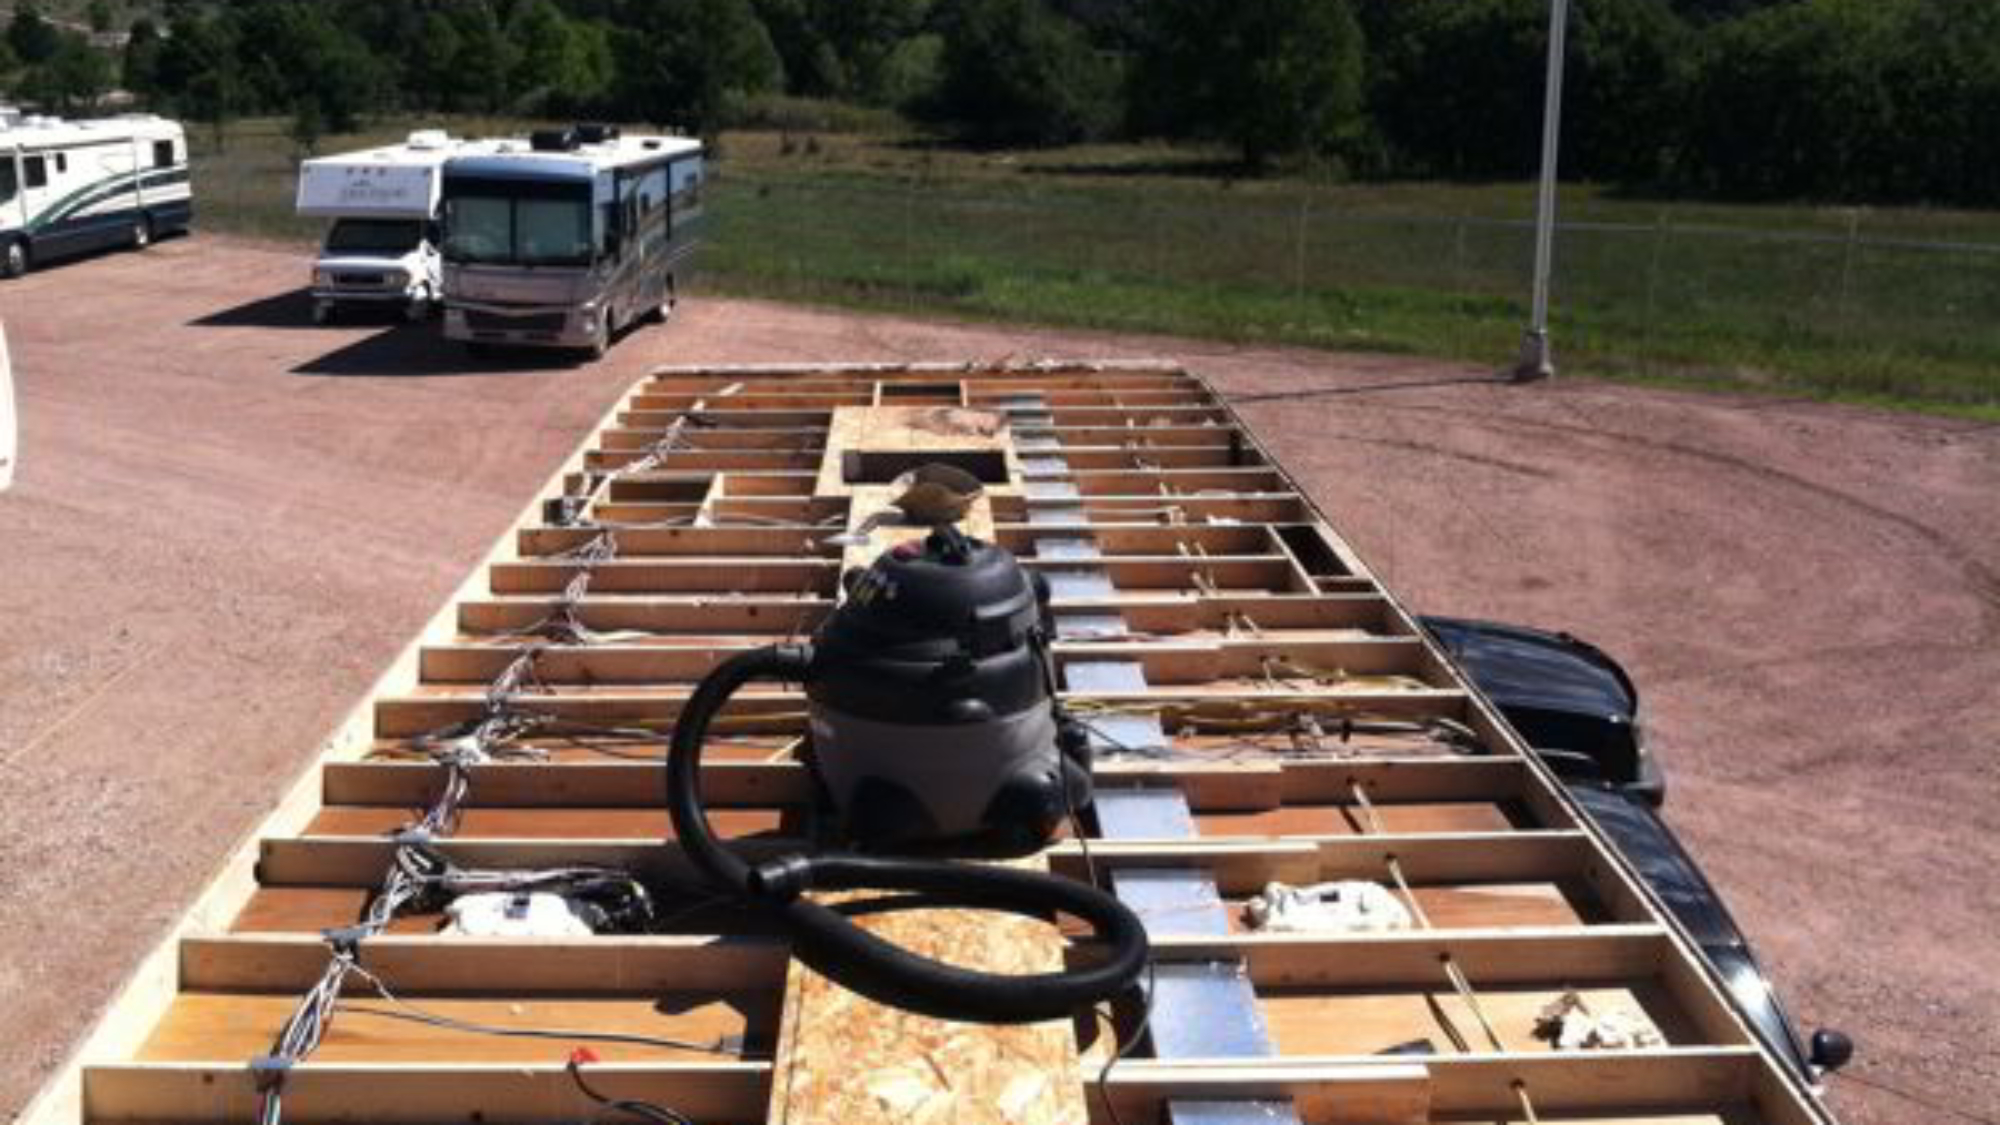
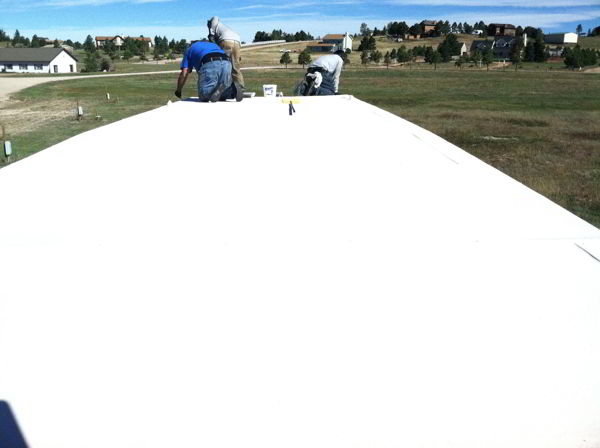
Ever wonder what it looks like when you tear off the roof of an RV?
Hopefully, you never have to know. If you do, it means you presumably had water damage, possible damage from falling tree limbs, or other maintenance concerns. RV roof replacement can be one of the most daunting projects to tackle, especially considering the level of labor and expense. It is more common than we would like to acknowledge, given that most RV roofs are not produced with longevity in mind. Water will ultimately find its way in. Sometimes it doesn’t even matter how diligent you are with your maintenance schedule.
ArmorThane RV Roof Replacement
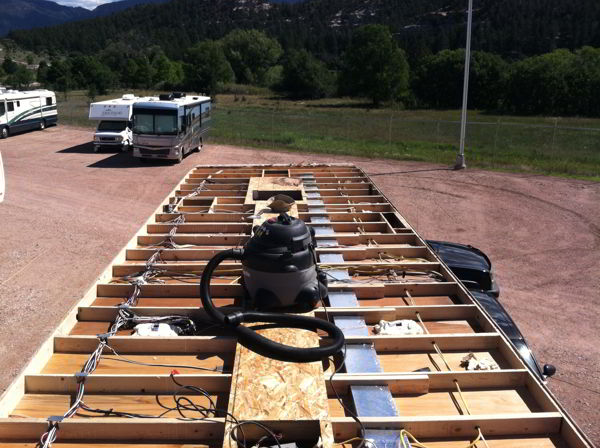
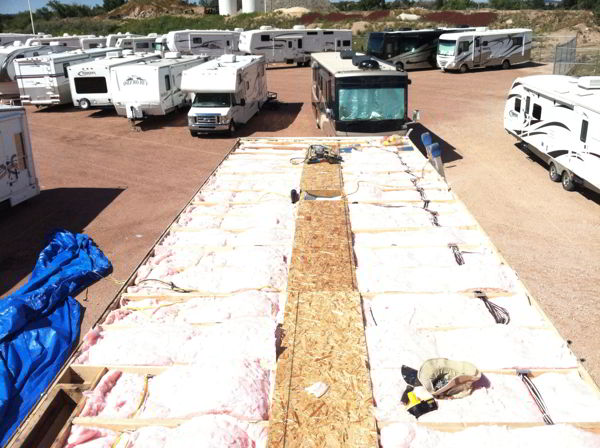
Most RV owners choose to seal or partially repair their RV roof and avoid having to replace it at all costs fully. An avid reader of our blog, onearmyrver decided to go all in and tear off the roof of his 2006 37′ Weekend Warrior 5th Wheel and do a full RV roof replacement after finding significant water and rot destruction. After tearing off the roof, he moved on to remove all the low-quality insulation after the grueling process of ripping off the roof. Not surprisingly, only around 50% of the roof was insulated. We assume the factory never anticipated an owner would tear off the roof to see the shoddy work.
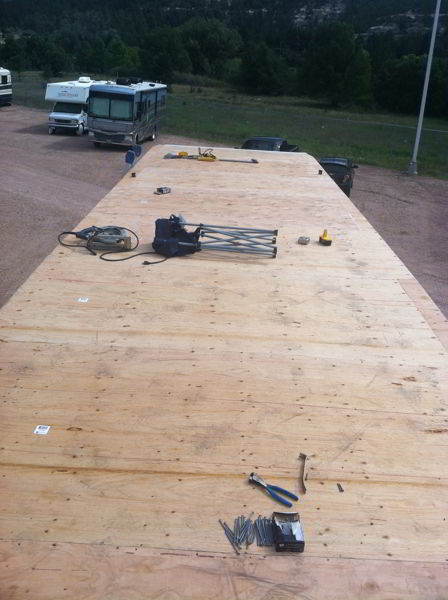
This is when the RV roof replacement got interesting. Once down to the bare structure, both spray and traditional insulation were installed where needed. Then, plywood was installed over the roof construction, which added supplementary weight (the repair increased the RV by 380lbs). Lastly, ArmorThane was used to coat the roof instead of the typical rubber roof material in an interesting twist. Though unorthodox, the premise is a great one. ArmorThane is a rugged weather-resistant material that seals permanently, locking out dust, dirt, and most importantly, water.
When you consider the cost of the typical 2006 fifth wheel, you can see why most folks decide not to do RV roof replacement as it is, cost-effective. The cost for a more conventional rubber roof does vary, but in this case, it would have run more than $5,000. The ArmorThane coating, which ran from the back of the fifth wheel to the front end and over the front, only cost $3,500. Also, the roof should last for many years without any problems as long as the vents/AC unit is correctly sealed and maintained.
Have you done an RV roof replacement? Would you consider ArmorThane bedliner material as an option? Please share in the comments below.
When you decide to purchase an RV, you are making a significant decision. For the majority of people, it is a considerable financial investment. As a result, it can be quite scary to purchase an RV as you do not know whether it is worth it. While that might be scary in the abstract, other things might be crossing your mind that scare you physically. For example, you might be terrified that a bear could get into your camper. After all, you will be investing a lot of time in the woods, and there is a great chance you will see a bear a few times. Thankfully, there are things you can do to bear-proof your camper.
Many people have quite a phobia over bears which is easy to understand. They are big, strong, and if they get disturbed, they could do some major damage. Nevertheless, it is extremely rare for individuals to get assaulted by bears, so there is a really low chance that you will have a deadly encounter with one. That being stated, it would not hurt to take some safety measures to guarantee that you and your household are safe on your next trip.
If you worry about bears, you will be glad to hear that there are things you can do to bear-proof your camper. If these things did not exist, there would be many people who would not go camping in areas with bears. Luckily, that is not the world we live in, so you can prepare for any possible dangers by taking steps to bear-proof your camper.
Before you put in the time to bear-proof your camper, we need to talk about whether bears can break into RVs. Regrettably, a bear can get into your RV. You see, bears are brought into anything that has food or anything that is scented. As a result, there is a good opportunity that if you do enough camping, a bear will smell the food in your RV at least as soon as.
Furthermore, bears are extremely intelligent creatures, which can be problematic. When you initially imagined a bear breaking into an RV, you probably thought about a violent scene where the bear broke the door or window. While the bear certainly will not be gentle, they can also be smart enough to choose locks.
As it ends up, bears do not care if you remain in an RV or a camping tent; they will try to burglarize your living area if they smell food. Leaving cooked food out is the most common cause of bears pickup on the scent of somebody’s campsite.
Nevertheless, other things attract bears as well, like the smell of aromatic toiletries. You might not think that bears would be drawn into that sort of scent, but it will attract them all the same.
So, it would help if you were mindful about leaving food out, and you require to be careful about bringing scented things on your camping journeys entirely.
How Do I Keep Bears Out of My RV?
So, you have taken the time to purchase your RV, and you are ready to go out to a campsite. Nevertheless, your fear of bears has left you paralyzed and not all set to dedicate to a trip. Fortunately, there are things you can do to ensure that bears do not get into your RV.
To start with, most camping sites that are understood to be in bear country have food lockers. Food lockers are big metal containers that are bear-proof. In addition, you can keep two large coolers therein. In this manner, if a bear questions onto the campground after smelling food, it will not go straight to your RV. Instead, it will go to the food lockers where it will not be able to break in.
Moreover, it would help if you made certain that your RV is entirely devoid of foodstuff other than in a refrigerator. Finally, ensure that you tidy completely after consuming a meal because bears can smell even the smallest food particles. Even if you have some crumbs that have fallen on the floor, they might pick up that scent.
Additionally, you must make certain that you do not save garbage in your RV. Trash certainly brings a strong scent, and bears will certainly pick up on it. Likewise, you can keep your garbage bags in the food lockers overnight if you do not have time to get to the bear-proof dumpsters before nightfall.
Some individuals also like to make candles to illuminate the location outside their RV if they are hanging out outside at night. Nevertheless, you need to ensure you bring them into your RV in the evening so that bears can not smell them. It is even much better if you buy odorless candles instead.
Now that we got all of the basic common sense things out of the way, lets discuss how you can bear-proof the exterior of your RV. When it comes to protecting my family, there is no pricetag on that. So i feel it makes sense to spend the extra hundreds of dollars in labor and product to bedliner (polyurea) protect my RV. This means any sensitive areas should be sprayed such as the doors, the lower half of the RV as well as the roof. ArmorThane offers a product called ArmorLiner that is ideal for this type of job. They will do all the work and once completed you will have the same material that is currently protecting the pentagon. This stuff is insanely tough, not even a yeti will be getting through.
Are Pop Up Campers Safe from Bears?
Appear campers are not necessarily the best alternative if you are remaining in an area known to have bears. While they are a much better defense than a tent, they do not safeguard along with a routine RV does. In addition, the walls of the turn-up camper are not as strong as the walls of a common RV. This is because the pop-up camper needs to fold, and it is rather smaller sized. So, it does not provide as much security.
With all that being said, you may believe that you are in danger if you go camping in an appear camper. That is not true as you can certainly go camping with an appear camper. Nevertheless, it is still a great idea to take some extra safety measures when you camp in one instead of an RV.
It would help if you were extra comprehensive in cleaning your turn-up camper. Take the additional time to guarantee that no crumbs are lying around on the floor of your camper. Otherwise, you could be in for an extremely bad time.
Do Car Alarms Scare Bears?
You may think that you can scare off a bear by producing loud, repetitive sounds like a car alarm. While this may operate in some scenarios, it will not always work. For example, a bear may be surprised or scared off by flashing lights, noisemakers, alarms, or lawn sprinklers the first time they encounter them. Nevertheless, after the first time, it will lose efficiency.
As we pointed out above, bears are intelligent creatures, and they will not be fooled by a loud noise more than as soon as. Studies have shown that unless something takes place to reinforce an alarm as a negative experience, the bar will not be prevented the next time it hears it. They will quickly discover that these alarms are not a threat to them, and they will ignore them completely. That being said, the commotion will at least inform you and the other campers that something has entered the campsite.
Alarms are particularly ineffective at campgrounds because typically, the bears in those locations connect with humans and human objects. Chances are, the bear you see on your campsite has wandered onto the campsite many times. As a result, there is an excellent chance that they have heard a car alarm before and know that it is not harmful. So, if you are planning on utilizing your cars and truck alarms as a deterrent, you should understand that it will not be extremely efficient in many circumstances.
Is an RV Refrigerator Bear Proof?
So, you may think that if you put food in your fridge, there is another barrier between the bear and the food. As a result, you may think that the bear might no longer detect that scent. Sadly, that is not constantly the case. While it holds that including another barrier in between the bear and your food will minimize the scent of the food, it will not eliminate it. As a result, there is still an opportunity that the bear might smell it because RV refrigerators are not bear-proof.
As a result, it is better to store your food in a food locker, as we talked about above. Additionally, you might buy a bear box that does a respectable task of eliminating the scent of food.
Nevertheless, it is probably a better concept to play it safe and keep your food outside your RV. It is better to avoid risk completely, and if you have access to an RV food locker, there is no factor in using it. So, utilize it, and you can rest easy knowing that no bears will be entering your RV at any time soon.
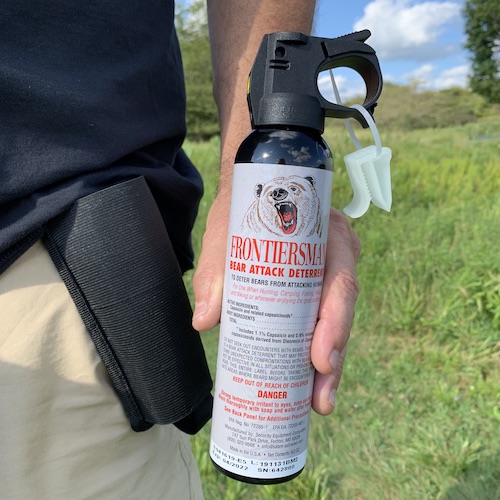
This is my bear spray and holster I wear when hiking in bear country!
Should I Keep Bear Spray on Board My RV?
This is the bear spray and holster I use when trekking in the bear nation!
If you were not mindful, bear spray is a type of aerosol that functions as a deterrent for bears. It has ingredients that will make bears run away and run away. As a result, it is a great idea to keep bear spray onboard your RV, on your belt loop at your campground, or when hiking in bear nation.
You never know when you are going to have an encounter with a bear. As a result, it is much better to be safe than sorry, which is why we constantly bring bear spray with us on our camping trips. We keep it on hand in our RV to utilize it at any time if requirement be.
In addition, we even bring bear spray with us on our hikes. Of course, there is always the concern that you will encounter a bear at the campsite. However, a minimum of you has the defense of your RV at the campground. However, lots of people do not think of the possibility of a bear encounter when trekking. Despite that, you remain in more danger on walking than in the campground because you have no instant protection. With that in mind, we always bring bear spray with us wherever we go when camping since we wish to be gotten ready for an emergency.
Keep in mind: If you are inside your camper and a bear is outside, you need not attempt to spray the bear from within your camper, or you will be inhaling the bear spray! Instead, keep an air horn on board and use that to frighten any bears away.
Below is a video that was made by the National Park Service on how to utilize bear spray.
How to utilize bear spray video made by the National Park Service
4 Tips to Keep Bears Away from Your RV
When you are at the camping site, you can do a few things to assist keep bears away from your RV. It is great to be prepared for if a bear enters a camping site and starts browsing your RV, but it is better to avoid that situation altogether if you can. So, here are a few suggestions on how to bear-proof your camper and keep them away.
1. Keep a Tidy Campsite
The very first and essential thing to do is something we have discussed a bit currently. You ought to ensure that your camping site is spick-and-span. Don’t leave garbage, coolers, or anything else outside your vehicle that may appear like it contains food. Anything that appears like a food container could draw in a bear.
In addition, you need to ensure that you bring everything into your trailer in the evening. That even consists of citronella candles. Bears discover aromatic things like those candle lights delicious and come to your RV if you leave them out.
2. Remember You are in Bear Territory
Before you head out on a trip, make sure you know whether you are remaining bear territory. If you are, do not go searching for bears to post on your social networks. This might appear obvious to most of you, but you would marvel at the number of individuals who put themselves in a damaged way for a couple of likes on Instagram. If you see a bear naturally, do not accentuate yourself or encourage interaction.
3. Stand Your Ground
You may have heard this before in motion pictures or TELEVISION programs; however if you ever come face to face with a bear, do not run. Under no circumstances need you to turn your back to the bear. Rather, you require to stand tall and stare at the beardown. You can even wave your arms back and forth above your head and speak in a loud and low voice. Then, you can retreat gradually and diagonally; however, if the bear starts to follow, stop and stand your ground.
In addition, you ought to also know that a bear may charge at you, but almost all charges are bluff charges. As insane and frightening as it may sound, do not run when the bear charges at you. Instead, wave your arms and yell at it in a low voice. Most charges are bluffs, and the bear will drift off to the side. A great deal of the time, the bear will come within a couple of feet of the individual before drifting to the side, so you require to be brave.
If the bear enters your camping site, chase it away strongly. Bang pots and pans together and throw rocks at it. If you need to, you can even strike the bear. Please do everything you can to keep it from getting food.
4. Inform Yourself on How to Handle a Bear Encounter
Many people think that it is a good idea to carry a weapon when taking a trip in a bear nation in case of emergencies. Nevertheless, there is a far higher possibility that you will shoot yourself or someone else than a bear, so this is not recommended. Instead, it is better to inform yourself on precautions and the indications of a bear attack.
Firstly, bears tend to conceal in thick and dense brushes. So, beware when you are camping in remote locations. Furthermore, you should avoid hiking alone. Strength in numbers is a real thing, and bears will be more hesitant to attack if you surpass it.
Lastly, you should know when a bear is planning an attack. An upset bear will lay its ear back and start to make loud huffing sounds. Next, it will pop its jaws and start to paw the ground with its front claws. It will then start to swing its head from side to side, and it may do a bluff charge. If you discover any of these signs, you require to be extra cautious. Utilize the techniques of deterrence that we talked about above, and you will give yourself the very best possibility to prevent a lethal encounter.
What Should You Do if A Bear attacks you?
Bear attacks are exceptionally rare if you inform yourself on how to behave when bears neighbor. However, if a bear attacks you, your reaction will depend on the type of bear you have encountered, according to the National Park Service in their short article called Staying Safe Around Bears.
National Forest Service
Bear attacks are rare; most bears are only interested in safeguarding food, cubs, or areas. However, being mentally ready can assist you to have the most reliable response. Every circumstance is various; however below are guidelines on how brown bear attacks can differ from black bear attacks. Help safeguard others by reporting all bear events to a park ranger instantly. Above all, keep your distance from bears!
Brown/Grizzly Bears: If you are assaulted by a brown/grizzly bear, leave your pack on and PLAY DEAD. Lay flat on your stomach with your hands clasped behind your neck. Spread your legs to make it harder for the bear to turn you over. Stay still till the bear leaves the area. Combating back generally increases the strength of such attacks. Nevertheless, if the attack continues, fight back vigorously. Use whatever you have at hand to hit the bear in the face.
Black Bears: If you are assaulted by a black bear, DO NOT PLAY DEAD. Try to escape to a safe place such as a car or building. If escape is not possible, try to fight back using any item readily available. Focus your kicks and blows on the bear’s face and muzzle.
If any bear attacks you in your tent, or stalks you and after that attacks, do NOT play dead– fight back! This sort of attack is extremely unusual, but can be major due to the fact that it frequently means the bear is searching for food and sees you as prey.
Stay Safe by Making Sure That You Bear Proof You Camper
After reading, we hope you have all the information on how to bear-proof your camper. We know there is a lot of info to absorb, but it is better to have more info than too little in a circumstance like this. The last thing you desire is to have an encounter with a bear and not know what to do. Many people that die from bear attacks ran away when they saw the bear and were ferreted out. If you do not flee, there is a great chance the bear will not attack.
Camping in an RV implies that you will likely have an encounter with a bear at some time. Whether this will just be a bear roaming onto the camping site or you have a direct encounter is unidentified, however you should understand what to do in both situations. So, take the time to do your research study, and you will be ok.
Camping in a brand-new RV is extremely amazing, however that pleasure will be cut short if a bear starts to bang on your RV. So, put in the time to bear-proof your camper and ensure you are safe. When this is done, you will have the ability to camp in peace.
Are you going to bear-proof your camper? Where are you taking a trip that makes you wish to bear-proof your camper? Have you ever had an encounter with a bear? Let us know in the comments!
Below is a video that was made by the National Park service on how to use bear spray.