On this page8 sections
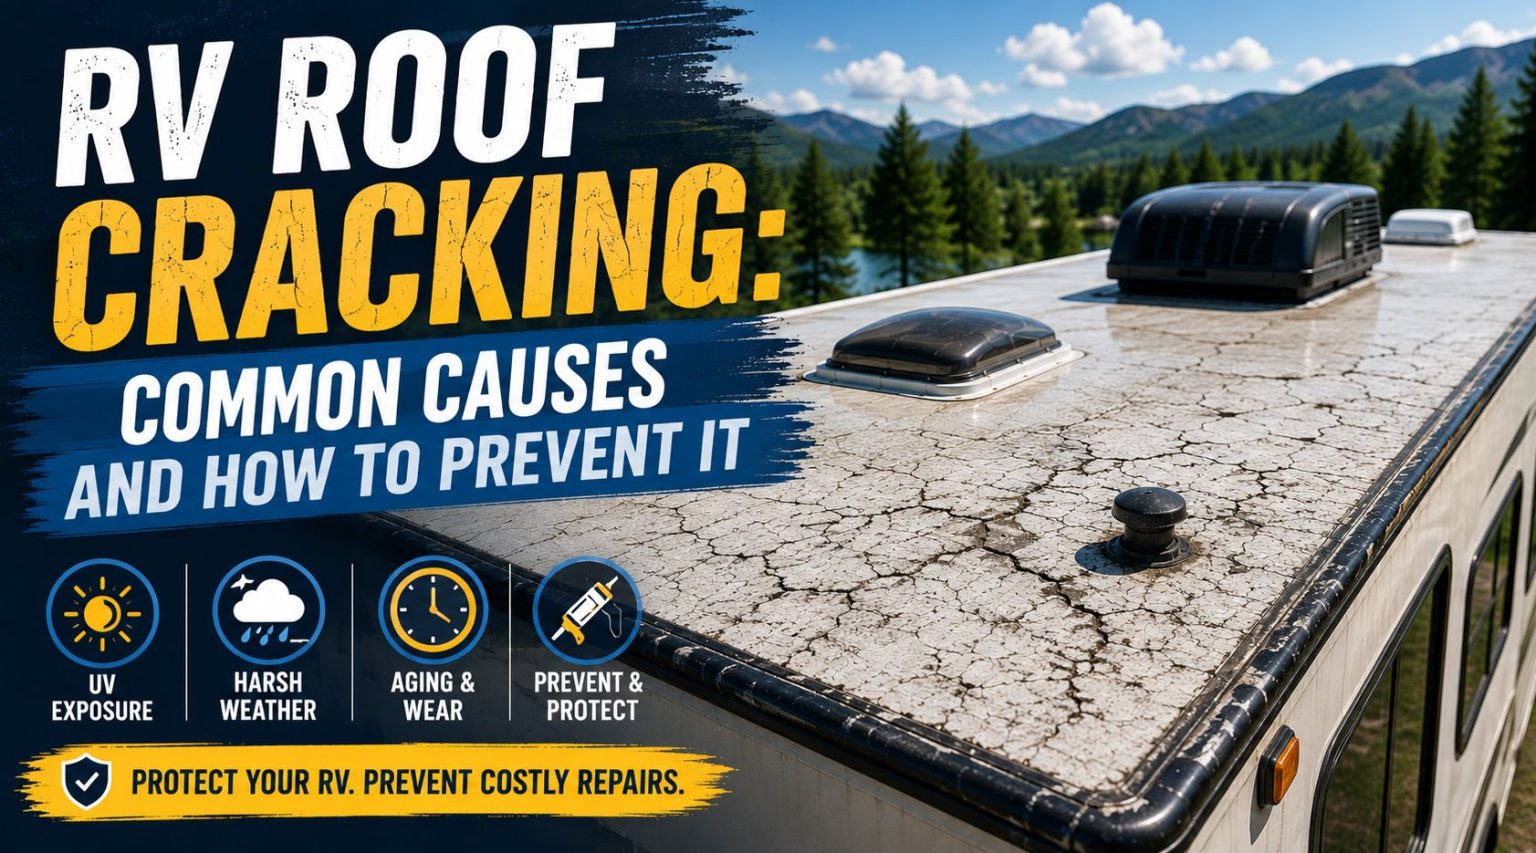
A cracked RV roof rarely happens overnight. It’s almost always the slow result of months or years of sun, weather, and everyday wear finally catching up with the material. The frustrating part is that cracks often start small enough to ignore, right up until one of them lets water into the roof decking and turns a cheap fix into an expensive repair.
Here’s how we approached this guide: we looked at what actually breaks down RV roofing material over time, compared that with common troubleshooting advice from RV technicians and roofing specialists, and combined it with the patterns RV owners consistently report when their roofs start to crack.
Why RV Roofs Crack
UV Exposure
Sunlight is the single biggest factor behind RV roof cracking. Constant UV exposure gradually breaks down the flexibility of rubber roofing materials like EPDM and TPO, along with the sealant used around seams and vents. Over time, the material becomes stiffer and more brittle, and brittle material is far more likely to crack under normal stress than material that’s still flexible.
Temperature Swings
RVs deal with a wider range of temperatures than most structures, especially if they travel between climates or sit outdoors through all four seasons. Roofing material expands slightly in heat and contracts in the cold, and repeated expansion and contraction, especially with sudden swings, gradually stresses the material and any sealant applied to it. This is part of why sealant that looked fine in fall can show cracking by spring.
Aging Sealant
Sealant naturally has a shorter lifespan than the roof membrane itself. As it ages, it loses elasticity and starts to shrink, crack, or pull away from the surface it was applied to. Once that happens, the surrounding roof material is more exposed to moisture and movement, which can accelerate cracking nearby.
Physical Impact and Debris
Tree branches, hail, and even routine impacts from low-hanging obstacles can create small cracks or punctures. These are often easy to miss until you’re specifically looking for them, especially if the RV has been parked under trees for a while.
Foot Traffic and Weight
Not every roof is built to handle regular foot traffic, and even ones that are can develop stress cracks over time from repeated weight in the same spots, like around a rooftop AC unit or vent that gets stepped near often during maintenance.
Roof Movement During Travel
Constant vibration and flexing from driving puts ongoing stress on the roof, particularly around seams and fixtures. This stress adds up gradually, which is one reason RVs that travel frequently often need more regular inspection than ones that stay parked most of the year.
Age of the Roof
Like most materials, roofing simply loses some of its original flexibility as it ages, generally becoming more prone to cracking even under normal conditions. Most RV roofs are expected to last somewhere in the range of ten to twenty years depending on material and care, but cracking tends to become more common as a roof approaches the older end of that range.
Common Signs of RV Roof Cracking
Cracks aren’t always obvious from the ground, so it helps to know exactly what to look for during an inspection:
- Visible hairline cracks in sealant around vents, skylights, and seams
- Cracking or flaking in the roof membrane itself, especially on older rubber roofs
- Chalking or a powdery residue on rubber roofing, a sign the material is breaking down
- Discoloration or stiffness in areas that used to feel more flexible
- Small blisters or bubbles, which can indicate moisture already trapped beneath the surface
Where cracks most commonly show up
| Location | Why It Cracks Here |
|---|---|
| Around roof vents | Constant sealant flexing and cutout edges |
| Skylight edges | Similar flexing plus more UV exposure |
| Roof seams | Movement during travel and sealant aging |
| Near AC units | Vibration, weight, and repeated foot traffic |
| Roof edges and corners | Highest UV exposure and temperature swings |
Does Roof Material Affect How It Cracks
Not every roof material cracks the same way, and knowing which one you have helps you know what to watch for.
EPDM rubber tends to be the most prone to UV related cracking over time. It’s a durable, budget friendly material, but it’s more sensitive to sun exposure and petroleum based products than other roofing types, which speeds up brittleness if it isn’t cared for consistently.
TPO rubber generally holds up a bit better against UV damage than EPDM, though it still needs the same basic care. Cracking on TPO roofs tends to show up later in the roof’s life if it’s maintained properly.
Fiberglass roofs are rigid rather than flexible, so instead of hairline cracking across large areas, they’re more prone to stress fractures, usually concentrated around penetrations like vents and skylights where the surface flexes slightly during travel.
Aluminum roofs are the most resistant to UV cracking of the common roof types, since metal doesn’t dry out or become brittle the way rubber does. Cracking on aluminum roofs is less about the panel itself and more about the sealant and seams around screws, seams, and fixtures.
How urgent is that crack?
Match what you see on the roof to how quickly you should act.
Tick everything you are seeing. Your action plan sorts itself by urgency.
Water has likely reached the decking. Bring in a professional before it grows into a decking or full roof replacement.
Water is already getting through. Find the crack letting it in and have a professional check the decking.
An open hole lets water straight in. Patch it promptly with a product made for tears and punctures, not just a surface crack fix.
Treat it right away: clean the area, remove old or loose sealant, and apply a fresh bead of sealant suited to your roof type.
Resealing again isn't working. Have a professional look before it turns into a decking or structural repair.
This is past spot repair. Get a professional assessment instead of chasing individual cracks with sealant.
They can mean moisture is already trapped underneath. Check the area for soft spots and repair the nearby crack.
Rigid fiberglass cracks where it flexes during travel. Seal them before water gets in, and recheck after long trips.
The membrane itself is breaking down. Seal isolated spots, and if it's widespread, have a professional assess the roof.
An early sign the material is breaking down. Clean it with a roof-safe cleaner, apply a UV protectant, and inspect twice a year.
Sun is making the material brittle. Add UV protection, park in shade or under a breathable cover, and watch for hairline cracks.
Your action plan
Act now0
Fix soon0
Keep watching0
What Happens If You Ignore RV Roof Cracking
A crack that’s left alone doesn’t stay small. Once water finds its way through, it can reach the roof decking underneath the membrane, which is typically wood or a composite material that wasn’t designed to handle repeated moisture. From there, the decking can soften, rot, or grow mold, and by the time that shows up as a stain on your ceiling, the damage has usually been developing for a while. What starts as a ten dollar tube of sealant fix can turn into a repair involving decking replacement or, in severe cases, a full roof replacement.
How to Prevent RV Roof Cracking
Inspect Regularly
Check the roof at least twice a year, ideally before and after your main travel season, and again after any major storm or long trip. Catching a hairline crack early is the difference between a quick sealant touch-up and a much bigger repair later.
Clean the Roof Consistently
Dirt and grime trap moisture against the surface and make it much harder to spot early cracking. A clean roof, checked regularly with a mild, roof-safe cleaner, gives you a clear view of any developing problems. Our guide on how to clean an RV rubber roof walks through the safest way to do this without damaging the material.
Reseal on a Realistic Schedule
Don’t wait for visible cracking to reseal. Sealant naturally breaks down over time even when it looks fine, so proactively resealing on a schedule based on your roof material and climate helps prevent cracks before they start. Our guide on how often you should reseal an RV roof breaks down realistic intervals.
Apply UV Protection
A UV protectant or conditioner slows down sun damage, which is the leading cause of roof cracking in the first place. This is a relatively low-effort step that can meaningfully extend the time between resealing and reduce how brittle the material becomes over the years.
Avoid Unnecessary Foot Traffic
Only walk on the roof when necessary, and if you do need to be up there regularly, try to vary where you step rather than repeatedly putting weight on the same spots.
Park Smart When Possible
Parking in shade or under a breathable RV cover reduces direct UV exposure when the RV isn’t in use. This won’t eliminate the need for maintenance, but it can meaningfully slow down how quickly the material dries out and becomes brittle.
Address Small Cracks Immediately
The moment you spot a hairline crack, treat it rather than waiting for your next scheduled inspection. A small amount of sealant applied early is far cheaper and easier than dealing with the water damage that follows if it’s left alone. For repairs involving actual tears or punctures rather than just surface cracking, our comparison of Dicor vs Eternabond can help you choose the right product for the job.
RV roof leak map
Tap a hotspot to see what fails there, how to check it and how it gets fixed. Mark each spot as you inspect it.
Front cap seam
Common leak point- What fails
- The joint where the front cap meets the roof takes the most wind load and chassis flex, so its lap sealant cracks and lifts first.
- How to check
- Run a finger along the whole bead. Look for hairline cracks, shrink-back from the edge, gaps or lifted corners.
- Typical fix
- Clean off loose sealant, then run a fresh bead of lap sealant made for your roof material. Use non-sag where the seam turns vertical.
Rear cap seam
Common leak point- What fails
- Same failure as the front: movement and sun break down the sealant where the rear cap meets the membrane.
- How to check
- Inspect the full width, including the corners where the seam turns down the sidewalls.
- Typical fix
- Remove what is loose and reseal. Self-leveling sealant on the flat roof, non-sag on vertical faces.
Roof vent flange
Common leak point- What fails
- Vent flanges are screwed through the roof. Sealant over the flange and screw heads cracks, and plastic vent lids go brittle in the sun.
- How to check
- Look for cracked sealant over every screw head, gaps at the flange corners and crazing or cracks in the lid.
- Typical fix
- Reseal over the flange and all screw heads. Replace a cracked lid or frame rather than patching it.
Air conditioner
Common leak point- What fails
- The AC sits on a foam gasket that compresses and takes a set over time, letting water past the roof opening.
- How to check
- Look for water stains on the ceiling around the AC, a gap under the shroud or loose mounting bolts inside.
- Typical fix
- Replace the gasket and snug the bolts to the maker's spec. Do not seal the AC base with caulk; it relies on the gasket.
Skylight
Common leak point- What fails
- Skylight domes craze and crack with UV, and the sealant around the frame fails like any other penetration.
- How to check
- Look for crazing, cracks or cloudiness in the dome and cracked sealant around the frame.
- Typical fix
- Reseal the frame. A cracked dome needs replacing; tape over a crack is only a temporary stop.
Second vent or fan
Common leak point- What fails
- Powered fans and bath vents fail the same way as any vent, and the extra hardware adds screw penetrations.
- How to check
- Check sealant over every screw, around the flange and at the corners.
- Typical fix
- Reseal over the flange and fasteners, and replace a cracked lid.
Refrigerator roof vent
Common leak point- What fails
- The fridge vent cap is a large opening with a long sealant perimeter that is easy to forget.
- How to check
- Inspect the sealant around the whole base and look for cracks in the cap.
- Typical fix
- Reseal the base; replace the cap if it is cracked.
Antenna, satellite and solar mounts
Check each season- What fails
- Every mount foot is a screw penetration, and cable entry plates add more.
- How to check
- Look for cracked sealant over each foot and at the cable entry plate.
- Typical fix
- Dab fresh sealant over each fastener and around cable entries.
Sidewall edge terminations
Common leak point- What fails
- Where the roof membrane wraps over the sidewall, a termination bar is screwed down and covered with sealant that cracks along its length.
- How to check
- Walk both edges and look for cracked sealant over the termination bar and exposed screw heads.
- Typical fix
- Reseal the full run. Straight seams like this are also where repair tape works well.
Open roof membrane
Most urgent when it fails- What fails
- The open field of the roof shows chalking, bubbles, tears and punctures, and soft spots where water has reached the decking.
- How to check
- Walk carefully and feel for flex or sponginess. Look for tears, bubbles and chalky residue.
- Typical fix
- Patch tears and punctures with a repair tape made for your membrane. Soft spots mean decking damage: repair them before they spread.
Ladder brackets
Check each season- What fails
- Upper ladder brackets are bolted through the rear cap or roof edge and loosen with use.
- How to check
- Look for cracked sealant or a loose bracket at the top of the ladder.
- Typical fix
- Tighten the bracket and reseal over the fasteners.
Plumbing vent pipes
Check each season- What fails
- Small plumbing stack vents have their own sealant collar and cap, which crack and blow off.
- How to check
- Make sure each cap is present and the sealant around the pipe is intact.
- Typical fix
- Replace a missing cap and reseal around the base.
DIY Repair vs. Professional Help
Small, isolated cracks are usually manageable as a DIY repair: clean the area, remove any old or loose sealant, and apply a fresh bead of the appropriate product for your roof type. Consider bringing in a professional if you notice:
- Cracking spread across large sections of the roof rather than a few isolated spots
- Soft or spongy areas, which likely mean water has already reached the decking
- Cracks that keep reappearing in the same spot even after repair
- Visible mold, a musty smell, or interior water stains
Ignoring these signs tends to turn a manageable repair into a significantly larger one involving decking or structural repair.
Frequently asked questions
What causes RV roof cracking most often?
UV exposure is generally the leading cause, since constant sun exposure gradually makes roofing material and sealant more brittle over time. Temperature swings, aging sealant, and physical impacts also contribute.
Is RV roof cracking always a sign of a leak?
Not immediately, but an untreated crack is an open door for water. Even a hairline crack that hasn’t leaked yet should be treated as a priority rather than ignored.
How can I tell if RV roof cracking is serious?
Small, isolated hairline cracks are usually manageable with a simple sealant repair. Widespread cracking, soft spots, or cracks that keep returning after repair are signs it’s worth having a professional take a look.
Can I prevent RV roof cracking completely?
Not entirely, since UV exposure and normal aging are unavoidable over time. Regular cleaning, proactive resealing, and UV protection can significantly slow it down and catch problems early.
How often should I check for RV roof cracking?
At minimum twice a year, plus a quick check after any major storm, long trip, or extended period of direct sun exposure.
Does the type of roof material affect how often it cracks?
Yes. EPDM tends to be more prone to UV related cracking over time compared to TPO, while fiberglass and aluminum have their own separate wear patterns, though all materials benefit from the same basic preventive care.
Final Thoughts
Check your roof for cracking before your next trip, especially around vents, skylights, and seams. A five minute inspection today is far cheaper than the repair bill that follows a crack left untreated through a full season of sun and rain.
RV roof cracking is almost always preventable, or at least manageable, when it’s caught early. It comes down to a predictable cycle of sun exposure, aging sealant, and everyday wear, which means a consistent routine of cleaning, inspecting, and resealing goes a long way toward keeping it from turning into a much bigger problem. Treat small cracks the moment you find them, and your roof will reward you with far fewer surprises down the road.
Did this guide help with your rig?

Written by