On this page6 sections
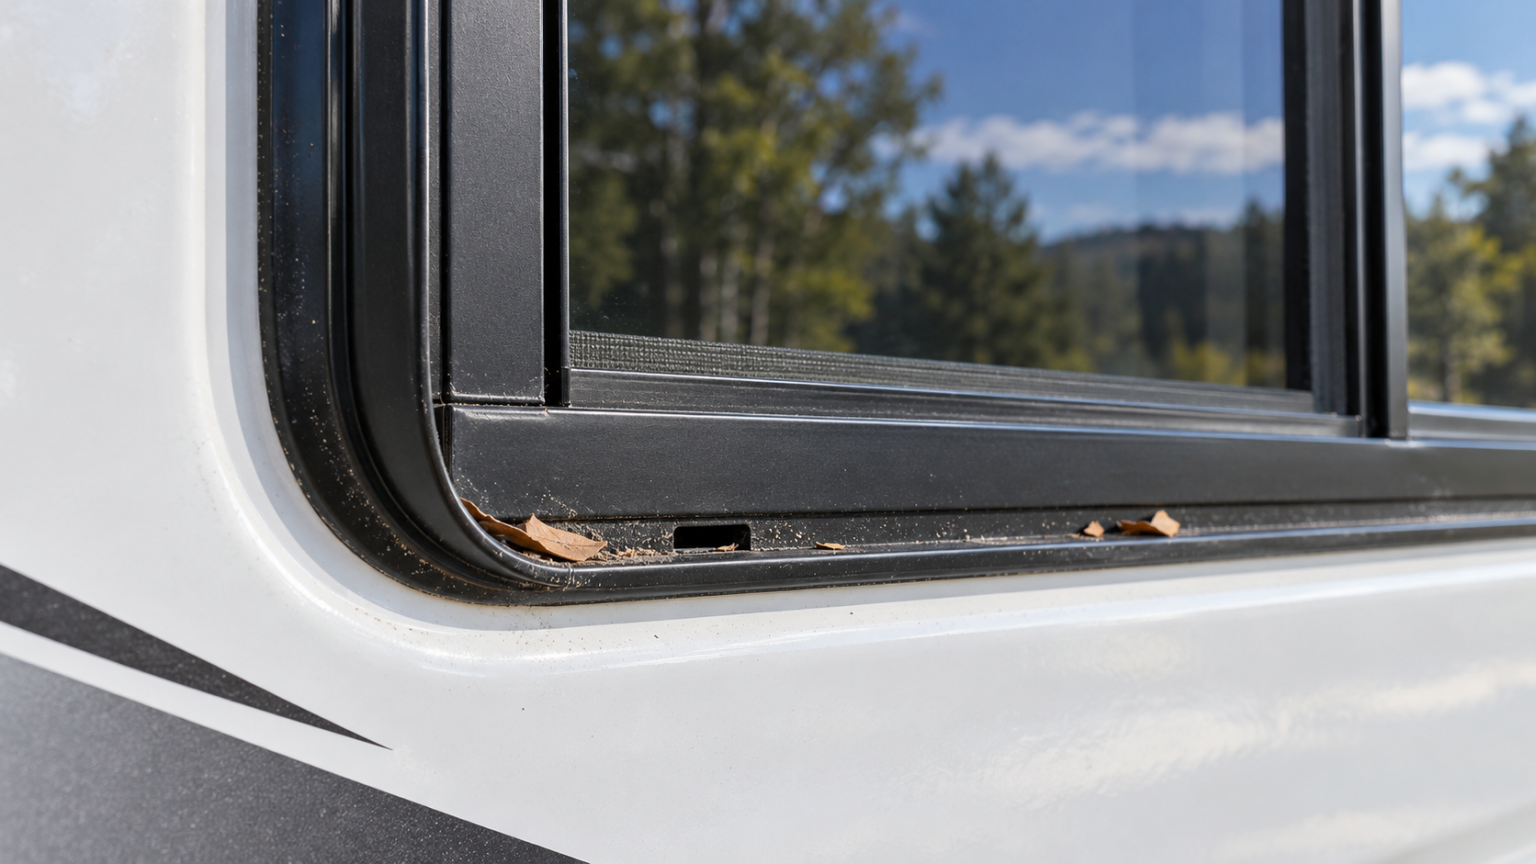
The small drainage openings in some RV window frames have a job: letting collected water escape. Covering them with sealant can interfere with that drainage. Before treating a wet window track as a failed perimeter seal, identify the window and check its intended water path.
This guide focuses on accessible inspection and light cleaning. It does not replace the window manufacturer’s instructions or a proper investigation of water entering the wall.
What window weep holes do
A window can use a lower channel to collect water and direct it outside through openings in the frame. Forest River’s motorhome manual describes bottom-tray weep holes that discharge water or condensation and stresses keeping the area free of debris. It also notes that an RV parked out of level may not drain properly.
Some moisture in a designed collection channel therefore needs context. Water overflowing onto interior trim, soaking the wall or repeatedly collecting without draining calls for further attention. Clearing visible debris is not proof that the entire window assembly is watertight.
Identify the window before touching the frame
Find the window brand, model or series in the RV’s component records, label or manufacturer documentation. Sliding, opening and fixed windows can have different construction. Do not assume that every slot, gap or removable-looking piece serves the same purpose.
For example, Lippert’s 8600 Series support page separates water-management information, installation instructions, track repairs and rain testing. That distinction matters: routine drain maintenance is different from removing a window, replacing glazing or altering a seal.
Photograph the frame before cleaning. If a small cover is missing, a slot appears sealed over, or you cannot identify the opening, ask the manufacturer or a qualified RV technician what belongs there. Avoid drilling new holes or removing unfamiliar plugs.
A careful drainage check
Park safely and follow the RV’s leveling instructions. Work from the ground or a suitable stable access platform; do not stretch from a ladder to reach an awkward corner. Keep emergency exits accessible throughout the work.
- Look inside first. Examine the accessible lower track for dust, leaves, insect debris and standing water. Note whether moisture is confined to the channel or has reached trim and wall surfaces.
- Check the outside openings. Locate the drains using the applicable window information. Look for visible dirt, obstructions or damaged components without pushing a tool into the frame.
- Remove loose surface debris gently. Use the cleaning tools and products permitted by the window maker. A soft brush can help lift accessible loose dirt, but do not drive it deeper into a narrow passage or force it past a seal.
- Inspect again. Check that cleaning has not left material across the openings. If an internal blockage remains or the cleaning method is unclear, stop and obtain model-specific guidance.
Winnebago’s moisture-care article specifically highlights dirt and insect nests as things that can obstruct weep holes. Removing visible buildup is a useful maintenance step; it does not identify every possible source of a leak.
Keep pressure and sealant away from the drains
Keystone’s window-maintenance guidance warns against pressure washing RV windows and recommends keeping weep holes clear. Do not use a concentrated water jet as a shortcut for clearing an unknown internal passage.
Likewise, avoid filling a drainage slot because it looks like an unfinished gap. Any proposed resealing should preserve the manufacturer’s water-management arrangement. A perimeter seal, glazing seal and drain opening have different roles; adding material indiscriminately can create another obstruction.
If the manufacturer specifies a water test, follow that exact method. Spraying water hard against a window is not a reliable substitute. Persistent water intrusion is a reason for controlled diagnosis by someone familiar with that window system.
If water keeps returning
Record when the moisture appears: after rain, after washing, during travel or during cold-weather occupancy. Photograph the first wet area before wiping it dry. That history gives a technician more useful evidence than a general description that the window leaks.
Check the surrounding frame and wall visually for stains, separation or distortion. Arrange prompt inspection if water reaches the wall, visible damage is developing, or the problem continues after permitted cleaning. Avoid removing interior trim or pulling the window as an exploratory step.
For the separate task of inspecting exterior joints, see the RV seal inspection guide. A drainage check complements that inspection; it cannot establish the condition of concealed seals or wall materials.
Make it part of regular maintenance
Follow the inspection interval in your RV and window manuals. Add a visual check when cleaning the RV or noticing new debris around a frame. Keep a short record of the window location, what you found, what you cleaned and whether further service is needed.
The aim is straightforward: preserve the designed drainage path, avoid unnecessary alterations and investigate water that escapes where it should not.
Did this guide help with your rig?

Written by