On this page6 sections
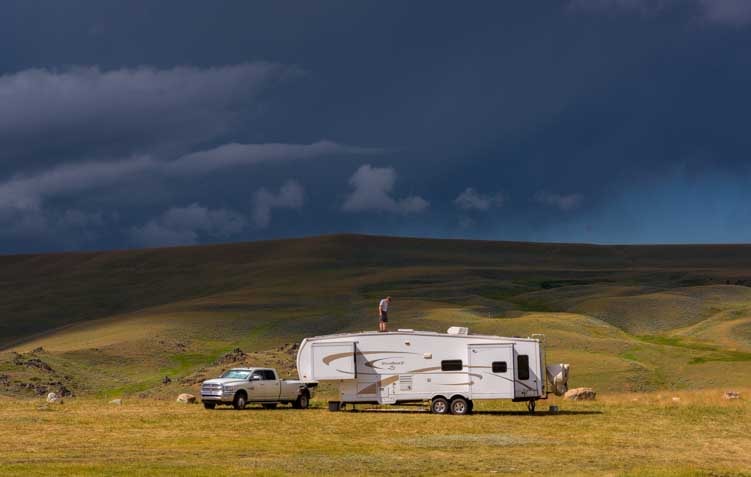
Many areas in the US are prone to hail storms all throughout the year. In Missouri we are prone to some of the most severe hail storms across the nation. That means your beloved RV could be struck by an infamous hail storm at any time while driving along the highway until it is safely in the backyard. If you don’t plan to leave your vehicle in your garage throughout the year, Missouri RV owners are likely to be hit by hail at any time.
Tips To Avoid Hail Damage
Although we recognize that the nature of RV-ing frequently isn’t a good fit for this kind of preventive measure however, we’ve provided three useful suggestions to follow when you are in the middle of a hailstorm or when one is nearing your town or city.
1. Check the Weather Forecast
It’s a simple, but essential idea! One of the most simple actions you can take is to look up the weather forecast for hail storms that are in your current location or the area you are travelling to. If you are concerned about the possibility of hail, perhaps you should delay your travel plans. If you’re close to or in your home, make sure you put your RV in your garage or under your carport.
2. If you’re driving, locate a covered Area immediately
If you’re trapped in a hail storm on the road or in the RV parks, you should try to locate shelter as fast as you can. We recommend that you stop at an open parking garage, gasoline station, beneath a tree that is fully grown. In the event that none are accessible then park your RV close to a structure as you can. This will give you some shade.
3. Make sure you have an RV cover in the event that you are unable to access Shelter
If you reside in an area that is prone to hail, it may be worthwhile to invest in a protective cover to protect your vehicle. Although this won’t stop every hail-related dent or ding from happening, the cover can help minimize the amount of damage. In addition, they can be excellent in protecting your RV from weather conditions like intense rain, harsh sunlight and powerful wind.
What Should You Do When Your RV is struck by hail
The extent and size of the actual hail particles and the extent of damage they cause to your vehicle could vary from small cracks and scratches to massive golf ball-sized scratches. On the outside hail damage to cars may appear like the damage on an RV. The majority of cars can be repaired by a procedure called paintless dent repairs, but hail dent removal is different for RVs. This is due to the fact that RVs comprise a majority from aluminum, fiberglass as well as wood sheathing. This means that the repair of damage caused by hail to your RV is more expensive and time-consuming than fixing a typical vehicle.
In addition to damaging the windows and windshields of your RV and body hailstones, body hailstones may cause damage to the following:
- Vents
- Roof-top air conditioners
- Polyurea Roof Coatings
- Skylights
- Solar panels
After a Hailstorm: RV Damage Checklist
Work through these in order once the storm has passed.
0 of 10 done
How do I know when I’m in need of Hail Damage Repair?
Other than obvious dents on your RV’s bodywork , or cracked windows, here are couple of other indicators that your RV is in need of repairs following a hail weather event:
- Damage is caused to vent and AC unit lids. The impact of hail can damage your air conditioners, or vent lids. If not repaired properly it could result in an increase in moisture in your motorhome, which could result in further damage later on.
- There are tiny bubbles or spots in the membrane made of rubber. The small amount of bubbles and tiny pots following a hailstorm could be a sign that the membrane is not firmly attached to the underlayment in specific regions. If it is not repaired sooner rather than later this can expose your RV to further damage.
- There may be mild to large spider cracks, or bruises to the gel coat Your RV’s fiberglass may also be affected by spider web cracks and bruises that allow moisture to enter the RV. If water is allowed to penetrate the surface, it could result in roofs sagging and delamination.
A few of these fixes like a vent repair could seem straightforward enough to repair by yourself, but they can turn out to be quite complex. For instance air vents are electrical components. If they’re not sealed correctly it could result in water damage afterward. This is why it’s recommended to leave hail damage to experts.
What is the cost of hail damage to my vehicle?
As we have mentioned in one of our earlier blog posts, the cost to repair sheets of sheet steel on RVs is about $9.50 or $13.50 for each square foot. Due to this cost it’s commonplace for RV owners to leave small hail damage, particularly if the damage is cosmetic. While some RV damages may appear minor, it’s best to repair it right as soon as possible.
Minor cosmetic flaws do not just reduce your RV’s selling value, but they could result in more expensive damages in the future. Did you know that the majority of RVs sold after minor hail damage are offered for between 25 and 40 percent of the initial price in Missouri? In addition should you suffer more damages from hailstorms to come, your insurance provider may not be able to cover the repair, because they may refuse to cover your claim due to previous damage.
RV roof leak map
Tap a hotspot to see what fails there, how to check it and how it gets fixed. Mark each spot as you inspect it.
Front cap seam
Common leak point- What fails
- The joint where the front cap meets the roof takes the most wind load and chassis flex, so its lap sealant cracks and lifts first.
- How to check
- Run a finger along the whole bead. Look for hairline cracks, shrink-back from the edge, gaps or lifted corners.
- Typical fix
- Clean off loose sealant, then run a fresh bead of lap sealant made for your roof material. Use non-sag where the seam turns vertical.
Rear cap seam
Common leak point- What fails
- Same failure as the front: movement and sun break down the sealant where the rear cap meets the membrane.
- How to check
- Inspect the full width, including the corners where the seam turns down the sidewalls.
- Typical fix
- Remove what is loose and reseal. Self-leveling sealant on the flat roof, non-sag on vertical faces.
Roof vent flange
Common leak point- What fails
- Vent flanges are screwed through the roof. Sealant over the flange and screw heads cracks, and plastic vent lids go brittle in the sun.
- How to check
- Look for cracked sealant over every screw head, gaps at the flange corners and crazing or cracks in the lid.
- Typical fix
- Reseal over the flange and all screw heads. Replace a cracked lid or frame rather than patching it.
Air conditioner
Common leak point- What fails
- The AC sits on a foam gasket that compresses and takes a set over time, letting water past the roof opening.
- How to check
- Look for water stains on the ceiling around the AC, a gap under the shroud or loose mounting bolts inside.
- Typical fix
- Replace the gasket and snug the bolts to the maker's spec. Do not seal the AC base with caulk; it relies on the gasket.
Skylight
Common leak point- What fails
- Skylight domes craze and crack with UV, and the sealant around the frame fails like any other penetration.
- How to check
- Look for crazing, cracks or cloudiness in the dome and cracked sealant around the frame.
- Typical fix
- Reseal the frame. A cracked dome needs replacing; tape over a crack is only a temporary stop.
Second vent or fan
Common leak point- What fails
- Powered fans and bath vents fail the same way as any vent, and the extra hardware adds screw penetrations.
- How to check
- Check sealant over every screw, around the flange and at the corners.
- Typical fix
- Reseal over the flange and fasteners, and replace a cracked lid.
Refrigerator roof vent
Common leak point- What fails
- The fridge vent cap is a large opening with a long sealant perimeter that is easy to forget.
- How to check
- Inspect the sealant around the whole base and look for cracks in the cap.
- Typical fix
- Reseal the base; replace the cap if it is cracked.
Antenna, satellite and solar mounts
Check each season- What fails
- Every mount foot is a screw penetration, and cable entry plates add more.
- How to check
- Look for cracked sealant over each foot and at the cable entry plate.
- Typical fix
- Dab fresh sealant over each fastener and around cable entries.
Sidewall edge terminations
Common leak point- What fails
- Where the roof membrane wraps over the sidewall, a termination bar is screwed down and covered with sealant that cracks along its length.
- How to check
- Walk both edges and look for cracked sealant over the termination bar and exposed screw heads.
- Typical fix
- Reseal the full run. Straight seams like this are also where repair tape works well.
Open roof membrane
Most urgent when it fails- What fails
- The open field of the roof shows chalking, bubbles, tears and punctures, and soft spots where water has reached the decking.
- How to check
- Walk carefully and feel for flex or sponginess. Look for tears, bubbles and chalky residue.
- Typical fix
- Patch tears and punctures with a repair tape made for your membrane. Soft spots mean decking damage: repair them before they spread.
Ladder brackets
Check each season- What fails
- Upper ladder brackets are bolted through the rear cap or roof edge and loosen with use.
- How to check
- Look for cracked sealant or a loose bracket at the top of the ladder.
- Typical fix
- Tighten the bracket and reseal over the fasteners.
Plumbing vent pipes
Check each season- What fails
- Small plumbing stack vents have their own sealant collar and cap, which crack and blow off.
- How to check
- Make sure each cap is present and the sealant around the pipe is intact.
- Typical fix
- Replace a missing cap and reseal around the base.
Repair Your RV Hail Damage Today
If you’ve experienced hail damage to your RV, please be sure to give Elite Dent Company of Springfield MO a call. Elite Dent are the go to professional paintless dent removal company in the midwest that will have your vehicle looking as new, and get you back in the road in very little time in any way.
Are you experiencing hail damage to your vehicle? Visit this link to make an appointment to repair it. As the industry’s top choice Coach Specialists is here to assist you with your repair requirements for your RV. Contact us today or complete our contact form below.
Related guides
Frequently asked questions
How much does RV hail damage repair cost?
It depends on how much of the coach was hit and what it's made of. As a rough guide, repairing sheet metal panels on an RV runs about $9.50 to $13.50 per square foot, which is why many owners leave small cosmetic dings alone. That can backfire, since unrepaired damage lowers resale value and can complicate future insurance claims.
Can paintless dent repair fix hail damage on an RV?
Sometimes, but don't assume it. Paintless dent repair handles most hail damage on cars, but RVs are built mostly from aluminum, fiberglass and wood sheathing, so hail dent removal works differently. It usually takes longer and costs more than a car job. Have a hail repair shop look at the specific panels before you count on a quick fix.
What parts of an RV does hail damage besides the body?
Look past the dents. Hail can break windows and the windshield, crack roof vents and their lids, damage the rooftop air conditioner, and hit skylights, solar panels and roof coatings. On the roof itself, watch for small bubbles in the rubber membrane and spider cracks in fiberglass gel coat, since both can let water into the structure.
Can I repair hail-damaged RV roof vents myself?
You can, but it's easy to get wrong. A cracked vent looks like a simple swap, yet powered roof vents are electrical components, and if the replacement isn't sealed correctly, water works its way in and causes damage later. For vents and AC lids especially, leaving the repair to a hail damage pro is the safer call.
Should I fix minor cosmetic hail damage on my RV?
Yes, and sooner is better. Small dings may look harmless, but they cut into resale value and can turn into more expensive damage over time. There's an insurance angle too: if another hailstorm hits, your insurer may refuse to cover the new repair because of the earlier damage you never fixed.
Did this guide help with your rig?

Written by