DSCN1827

The Ultimate RV Roof Repair Solution: Polyurea Coatings


As an RV owner, ensuring the longevity and structural integrity of your vehicle is of utmost importance. One area that requires regular maintenance and repair is the roof. Exposed to extreme weather conditions and constant wear and tear, an RV roof often becomes susceptible to leaks and damage. Fortunately, there are numerous RV roof repair options available in the market, with one particularly innovative and effective solution being the application of polyurea coatings. In this comprehensive blog post, we will explore the benefits of using polyurea coatings for your RV roof repair needs.

1. Understanding Polyurea Coatings
Polyurea coatings are advanced thermosetting polymers derived from a combination of isocyanates and amines. They possess exceptional durability, flexibility, chemical resistance, and waterproofing properties. Originally developed for industrial and commercial applications, polyurea coatings have gained popularity in the RV industry due to their ability to provide a seamless, protective barrier to the roof surface.

2. Benefits of Polyurea Coatings for RV Roofs
a. Excellent Waterproofing: Polyurea coatings form a seamless membrane that effectively guards against water infiltration, preventing leaks and potential water damage inside your RV. This property is particularly essential in regions with heavy rainfall or harsh climates.
b. UV Resistance: Polyurea coatings are highly resistant to UV radiation, preventing degradation and color fading caused by prolonged exposure to the sun. By shielding the roof from UV damage, polyurea coatings extend its lifespan.
c. Flexibility and Cracking Resistance: As RV roofs constantly expand and contract due to changes in temperature, it is crucial to have a strong, flexible coating. Polyurea coatings exhibit excellent elasticity, ensuring they can withstand the stress induced by thermal cycling without cracking or peeling.
d. Seamless Application: The spray-on nature of polyurea coatings allows for a seamless application, eliminating seams or joints that could potentially lead to leaks or weak spots in the roof. The even, smooth finish also enhances the aesthetics of your RV.
e. Chemical Resistance: Polyurea coatings are resistant to chemicals commonly found on RV roofs, such as gasoline, oils, and cleaning agents. This resistance ensures that the coating remains intact and unaffected by routine maintenance and cleaning procedures.

3. Application and Process
Applying polyurea coatings to an RV roof requires specialized equipment and expertise. It is recommended to hire a professional contractor experienced in polyurea application to ensure a proper and successful repair. The process typically involves the following steps:
a. Cleaning and Preparation: Thoroughly clean the roof surface, removing any dirt, debris, or loose materials. Repair any existing damage, such as leaks or cracks, before proceeding.
b. Priming: A primer is applied to enhance adhesion and ensure the longevity of the polyurea coating.
c. Application: Using specialized spray equipment, the polyurea coating is evenly distributed across the entire roof surface. The coating adheres instantly, forming a monolithic membrane that is resistant to water penetration and UV damage.
d. Curing: Polyurea coatings have a quick curing time, usually within a few hours, depending on environmental conditions. Once cured, the roof is ready for use and can be exposed to the elements without risk of damage.

4. Cost Considerations
While polyurea coatings may initially seem more expensive than other repair options, their long-lasting durability and effectiveness justify the investment. Compared to traditional repair methods that require frequent maintenance and potential reapplication, polyurea coatings can extend the life of an RV roof significantly, saving both time and money in the long run. The cost of hiring a professional contractor for a polyurea application should also be factored into the overall repair budget.

Conclusion
For RV owners seeking a reliable, long-lasting solution for roof repairs, polyurea coatings offer numerous benefits. From exceptional waterproofing to UV resistance, flexibility, and ease of application, polyurea coatings provide the ultimate protective barrier for your RV roof. While the initial cost may be a consideration, the investment is worthwhile when considering the extended lifespan and reduced maintenance requirements. To ensure a successful repair, it is advisable to consult with a professional contractor experienced in polyurea application. With their expertise and the application of polyurea coatings, you can say goodbye to roof leaks and worries, allowing for a worry-free RV adventure.

easy-rv-camper-ideas-1562098935

RV Roof Coatings: Why They’re Essential for Longevity and Protection

When it comes to owning an RV, maintenance is key to ensuring its longevity and protecting your investment. One crucial aspect of RV maintenance is roof care, as the roof is constantly exposed to harsh weather conditions, UV rays, and other elements that can cause damage over time. This is where RV roof coatings come into play, providing an extra layer of protection to extend the lifespan of your RV and keep it in optimal condition.

In this blog post, we will explore the importance of RV roof coatings, how they work, and the benefits they offer to RV owners.

What are RV roof coatings?

RV roof coatings are specially formulated products designed to protect the roof of your recreational vehicle. They typically come in liquid form and are applied directly to the roof surface, forming a seamless, watertight barrier. These coatings are typically made from materials such as acrylic, silicone, or elastomeric polymers, each offering specific advantages depending on your needs and preferences.

Why are RV roof coatings important?

  1. Waterproofing: One of the primary benefits of RV roof coatings is their ability to create a waterproof barrier on the roof surface. Regular exposure to rain, snow, and even condensation can result in leaks and water damage inside your RV. By applying a roof coating, you can prevent water from seeping through the roof, protecting the interior of your RV from potential damage.
  2. UV protection: The sun’s UV rays can be extremely damaging to the roof of your RV. Over time, prolonged exposure can cause the roof to crack, fade, and deteriorate. RV roof coatings contain UV stabilizers that shield the roof from harmful UV rays, preventing premature aging and extending the lifespan of your RV.
  3. Temperature regulation: RV roof coatings also help regulate the temperature inside your RV. They reflect sunlight, reducing heat absorption and keeping the interior cooler during those hot summer months. By preventing excessive heat buildup, you can reduce your reliance on air conditioning, resulting in energy savings and a more comfortable living space.
  4. Preventing leaks and moisture damage: As mentioned earlier, RV roof coatings create a seamless, watertight barrier that prevents leaks and moisture from penetrating the roof surface. This is crucial for preventing mold, mildew, and rot, which can cause serious damage to the structure of your RV and compromise your health.
  5. Easy application and cost-effective: Applying an RV roof coating is a relatively simple process that can be done by most RV owners. It doesn’t require specialized tools or equipment, making it a cost-effective option compared to other roof repair methods. Regularly applying a roof coating can save you money in the long run by preventing costly repairs caused by water damage or roof deterioration.

Choosing the right RV roof coating

Now that we understand the importance of RV roof coatings, it’s essential to choose the right coating for your specific needs. Consider the following factors when selecting a coating:

  1. Material: As mentioned earlier, RV roof coatings are typically made from acrylic, silicone, or elastomeric polymers. Each material offers unique advantages, so do your research and choose the one that suits your RV and environment best.
  2. Application method: Some RV roof coatings require specific application methods, such as spraying, rolling, or brushing. Consider your comfort level with these methods and choose a coating that aligns with your capabilities.
  3. Longevity and durability: Look for a roof coating that offers long-lasting protection and can withstand the elements. Consider the warranty offered by the manufacturer and read customer reviews to gauge the performance and durability of the coating.
  4. Compatibility: Ensure the roof coating you choose is compatible with the material of your RV roof. Different types of roof coatings are designed for specific roof materials like EPDM, TPO, or metal, so make sure you choose a coating that is compatible with your roof type.

Application and maintenance

Once you’ve chosen the right RV roof coating, proper application is crucial to achieving optimal results. Follow the manufacturer’s instructions carefully and ensure the roof surface is clean, dry, and free from any debris before applying the coating. If necessary, make any repairs or fixes before applying the coating to ensure a seamless, watertight barrier.

Regular maintenance is also essential to maintain the effectiveness of the roof coating. Inspect your roof frequently for any signs of damage, such as cracks, peeling, or discoloration, and make any necessary repairs promptly. Additionally, it’s a good idea to reapply the roof coating every few years to ensure continued protection.

In conclusion, RV roof coatings are an essential investment for any RV owner looking to extend the longevity of their vehicle and provide maximum protection from the elements. By creating a waterproof barrier, offering UV protection, regulating temperature, and preventing leaks and moisture damage, roof coatings play a crucial role in maintaining the integrity of your RV. Choose the right coating for your needs, apply it correctly, and perform regular maintenance to keep your RV in optimal condition for years to come.

rigs-14

ArmorThane Spray Foam & Spray Foam Rigs

Get everything your residential and commercial insulation business needs to get started or scale-up. ArmorThane is your go-to shop for insulation and coating materials, equipment and supplies, and certified spray foam training. With over 30 years of experience in the industry, we are ready to train your entire staff and provide the products you need.

Mobile spray rigs are a smart purchase for any spray foam insulation business. They can considerably increase both the production and fecundity of your business by empowering job sites to keep running sleekly with zero downtime.

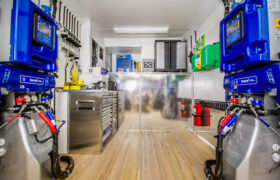
For those contractors new to the coating industry, a spray rig serves as a self-contained, complete job site, all in one convenient, compact transportable unit. It contains all of the necessary spray equipment to complete a protective coating job, in a setup that is easily moved and transported to your next job site.

Spray rigs give the advantage of having an enclosed space within which all of your essential equipment and supplies can be arranged securely and protected from the elements.

We also provide service for all of our available equipment, as well as older model spray foam equipment. Start now and contact us today.

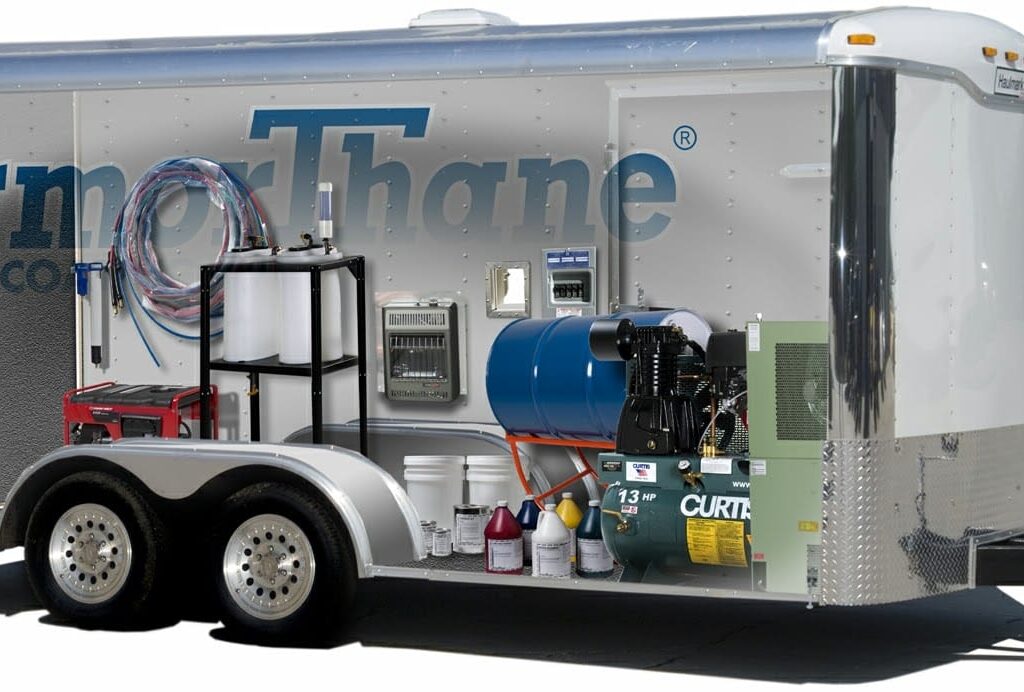
Spray Foam Rigs and Mobile Trailers

Our spray foam rigs are uniquely designed to spray a wide range of spray foam insulation and coating applications. All of our rigs are custom designed with the material applicators in mind and made with high-quality spray foam insulation equipment. At ArmorThane, we offer five different spray foam rigs including:

• Portable Rigs

• Economy Rigs

• High Production Rigs

• Custom Rigs

• Box Trucks

Choose from our multiple series spray foam trailers and box trucks. The interior of our rigs are coated from top to bottom with protective coatings along with well illuminated colorful interiors to maximize visibility.

Spray Foam Equipment for Sale at ArmorThane

Whether your spray foam needs consist of interior spray foam insulation or exterior spray foam roofing and polyurea protective coatings, we’ve got you covered. Our team consists of highly experienced and certified professionals with decades of hands-on experience. They are always ready to answer all of your questions and help you find the solution you need.

With ArmorThane’ vast knowledge and wide range of application solutions, we are here to help you find the right equipment for your next project. Whether you need equipment for residential and commercial insulation, tanks, parking decks, bridges, roads, or roofs, we can help with all of your needs.

Our Process

Designed with the customer in mind and engineered for superior performance, our designs include a variety of high-quality proportioners and reactors from PMC and Graco. Other features include PMC and Graco spray guns, heated hoses, and top-of-the-line transfer pumps – along with a full line of parts and other equipment. All are made in the USA and backed with a manufacturer’s warranty.

With over 30 years in the industry, we have seen it all. Not only do we have the polyurethane equipment, parts, and rigs you need, we can train any size team. We also supply automated spray robots for; roofing, fabric applications, decking, roads, bridges, and more. Our unique drum heaters also keep your material warm and ready to use.

Additional spray foam equipment for sale includes:

• Spray guns

• Transfer pumps

• Hoses

• PPE and safety equipment

• Used equipment

A Full-Service Spray Foam Equipment Supplier

ArmorThane is a full-service spray foam equipment supplier located in Springfield, Missouri, and servicing all of the United States, Mexico, Canada, and abroad. We provide dependable and cost-efficient polyurethane products and spray foam equipment to all fifty states and Canada.

With years of industry experience and reliable products, ArmorThane is ready to help you tackle your next project. Contact us today for all of your spray foam equipment and manufacturing needs.

ARMORLINER-RV-Fixes

What’s It Cost To Reseal An RV Roof?

You’ve had your RV for many years now. It keeps you warm, dry, and safe year after year on each trip you take. You’re now giving your roof the bad eye, knowing that it is time to give up several months’ pay to give it some TLC, or perhaps it is time to reseal the RV roof.

So, what is the cost of resealing your RV roof?

It depends on what type of roof you have, and how much damage your roof has sustained. Here are the average costs per square foot:

Rubber roof45 cents per square foot
Fiberglass roof18 cents per square foot
Metal Roof21 Cents per Square Foot

You should consider the cost of roof coatings as well as the costs of roof cleaning chemicals and supplies that will be required to prepare the roof for the new coating.

What is the Difference between Sealants and Coatings?

Your RV roof will eventually need to be replaced, just like a house. It may be worth considering re-coating your entire roof if your RV is more than 9 years old. Coatings can be used to cover the entire roof. You will need to choose the right coating for your RV’s roof, depending on whether it is made of rubber, fiberglass or metal.

Before applying any sealants or coatings, thoroughly clean the roof. You can find many roof coatings online. Heng’s Rubber Roof Coating was the best. Two coats of rubber roof coating are recommended. The first coat should be completely dry before applying the second.

Only one coat is required if you are using a silicone roof coating. Acrylic and urethane types require two coats plus a primer.

You can use an RV roof sealant to “coat” your roof. Many are used to seal cracks and areas on the roof that have leaks. Sealants can be liquid, tape, caulk, or both. Sealants work by sealing holes in the RV roof, around vents, and gaps between windows, as well as cracks at the a/c unit. To ensure that sealant adheres properly, clean the area where it will be applied.

A caulk gun can be used with the appropriate roof caulk to seal cracks. Sealant tape such as EternaBond is another useful product. It requires very little preparation. It is available in a variety of lengths and widths. It also protects against the elements well.

It is common to use the terms coatings and sealants interchangeably. You can find the right coating or sealant to protect your RV.

Re-roofing or coating your roof

The process of coating an RV roof should take less than one day. Wash the RV roof first with a suitable cleaner. The roof should then dry completely. Rubber roofs can be cleaned with a cleaner/activator. Many are available on Amazon.com. The cleaner/activator can be used to open pores in the EPDM membrane over several hours. This allows the coatings to bond with the roofing.

It’s a good idea for RV owners to tape the edges using a quality painter’s tape to prevent any coating from sticking to the sides.

Use a medium-nap roll to apply the first coat. Let dry completely. Drying time can vary depending on temperature and humidity. Allow the second coat to dry for 3-4 hours before it is time to apply the roof coating. To ensure that the roof coating is fully dry, do not allow the RV to be used for at least 24 hours.

Clean and dry the roof area where the sealant will be applied. There are many options for RV roof cleaners. A mixture of Tide and warm water works well. Dawn dish soap is useful for many cleaning tasks but can leave a film on your roof that could prevent sealant adhering.

Check the RV roof under good lighting. You want to find potential leaks and seal them before any damage can occur.

You will only need to remove old sealant from cracks in the roof if it is separating or loose. Remove a rubber roof carefully to avoid damaging the material. The sealant can be removed with a putty knife, or a flat, wide blade. A heat gun and a putty knife are helpful in removing an aluminum roof.

Use a cloth to clean the area and then use denatured alcohol. Seal the RV roof with the appropriate sealant. If necessary, apply additional sealant.

Regular inspection of seams on your RV’s exterior is a good idea. You can find sealants that are compatible with the RV’s roof and surface in the RV Owner’s Manual.

How to Find a Roof Leak

A roof leak will not happen to everyone. There will be those who experience a roof leakage. It’s best to learn how to prevent them from happening, and/or where they are coming from if your RV does leak. In many areas of our lives, we can all agree with Ben Franklin’s statement that “an ounce of prevention is worth a thousand cures”. Leaks are not a topic that is fun, so it is worth your time to keep an eye on them.

A professional can perform a pressure test inside the RV to find external leaks. This is the best way to identify if there is a roof leak. Air will be forced out of your RV’s crevices and cracks if you create more pressure inside than outside. A professional can inspect the RV’s exterior with soapy water to find any potential leaks.

Leakage can be caused by several items, such as a damaged compression seal, urethane or silicone sealant, or a butyl tap used as a filler. You should inspect these items periodically for missing or lose gaskets, cracks or crevices as well as gaps at windows and loose sealant. You can save a lot of money and headaches by being proactive.

You can prevent roof leaks by having a plan for maintaining, restoring, or resealing your roof as necessary.

Is it time to replace my roof?

Rubber TPO roofs should not show signs of tearing or bubbling. You may consider replacing your roof if you notice multiple areas that are showing signs of wear or if the damage is so severe that it is threatening the entire roof.

You will need to take down the awning and other roof-attached items in order to replace the roof. You will need to remove the entire roof membrane and replace any plywood that is damaged underneath. The roof membrane can then be replaced and all roof items (vents, AC units, antenna, etc.) are put back in place. The RV’s sides and roof edges must be sealed properly.

This is a major undertaking that should be handled by an RV technician.

Polyurea Roof Coating

This is a cool product that will keep your RV roof dry and clean for many years.

Spray on rubber bed liners are also installed by the same companies as pick-up trucks. They also use the same product to replace an RV roof. This coating was applied to my pick-up truck and it never got punctured. It lasted for many years despite being thrown concrete, concrete, and even rebar. This is the product that I will use to replace my RV roof.

This type of roof coating is called polyurea roof coating. It is easy to maintain, seamless, puncture-resistant, and will not crack, sun-rot, or deteriorate. Roof coatings do not require inspection, re-sealing or conditioning. It often comes with a 20-year guarantee.

Here is the website for ArmorThane , which is a company that has a multitude of bedliner applicators throughout the world. You might be able to find one near you that does this.

Conclusion

When it comes time to replace your RV roof or reseal it, you can choose which option suits you best. While some people will save money by doing it themselves, others will hire professionals to do the job properly.

Whatever your choice, we hope that this article will help you find the right way!

rv-roof-replacement-1

RV Roof Replacement Using ArmorThane On A Weekend Warrior Fifth Wheel

Water and Rot can cause unsalvagable damage. At times an RV roof replacement is the only fix. An RV owner gets creative and uses ArmorThane to do just that!

Ever wonder what it looks like when you tear off the roof of an RV? 

Hopefully, you never have to know. If you do, it means you presumably had water damage, possible damage from falling tree limbs, or other maintenance concerns. RV roof replacement can be one of the most daunting projects to tackle, especially considering the level of labor and expense. It is more common than we would like to acknowledge, given that most RV roofs are not produced with longevity in mind. Water will ultimately find its way in. Sometimes it doesn’t even matter how diligent you are with your maintenance schedule.

ArmorThane RV Roof Replacement

Most RV owners choose to seal or partially repair their RV roof and avoid having to replace it at all costs fully. An avid reader of our blog, onearmyrver decided to go all in and tear off the roof of his 2006 37′ Weekend Warrior 5th Wheel and do a full RV roof replacement after finding significant water and rot destruction. After tearing off the roof, he moved on to remove all the low-quality insulation after the grueling process of ripping off the roof. Not surprisingly, only around 50% of the roof was insulated. We assume the factory never anticipated an owner would tear off the roof to see the shoddy work.

This is when the RV roof replacement got interesting. Once down to the bare structure, both spray and traditional insulation were installed where needed. Then, plywood was installed over the roof construction, which added supplementary weight (the repair increased the RV by 380lbs). Lastly, ArmorThane was used to coat the roof instead of the typical rubber roof material in an interesting twist. Though unorthodox, the premise is a great one. ArmorThane is a rugged weather-resistant material that seals permanently, locking out dust, dirt, and most importantly, water.

When you consider the cost of the typical 2006 fifth wheel, you can see why most folks decide not to do RV roof replacement as it is, cost-effective. The cost for a more conventional rubber roof does vary, but in this case, it would have run more than $5,000. The ArmorThane coating, which ran from the back of the fifth wheel to the front end and over the front, only cost $3,500. Also, the roof should last for many years without any problems as long as the vents/AC unit is correctly sealed and maintained.

Have you done an RV roof replacement? Would you consider ArmorThane bedliner material as an option? Please share in the comments below.

WWq